Install Elasticsearch 7.x on Ubuntu 20.04
Related topics:
- Install Elasticsearch 5.x on Ubuntu 16.04
- Install Elasticsearch 6.x on Ubuntu 18.04
- Install Elasticsearch 7.x on Ubuntu 20.04
In this tutorial I'm going to show you, how to install Elasticsearch 7.x on your Ubuntu Focal (20.04) Linux box.
Before you start! Please take a look at the official documentation! https://www.elastic.co/guide/en/elasticsearch/reference/current/deb.html
All commands needs to run as user root or via sudo.
Requirements
The Elasticsearch APT repository is using HTTPS. For this reason, you need to install the following package.
apt-get install apt-transport-https
Install Elasticsearch
Add official the APT repository to your sources.list
echo "deb https://artifacts.elastic.co/packages/7.x/apt stable main" > /etc/apt/sources.list.d/elastic-7.x.list
wget -qO - https://artifacts.elastic.co/GPG-KEY-elasticsearch | apt-key add -
apt-get update
Install
apt-get install elasticsearch
Configure Elasticsearch
In this case, we are going to setup a standalone Elasticsearch system.
Open the file /etc/elasticsearch/elasticsearch.yml to adjust the following values
#Set the name of your Elasticsearch Cluster
cluster.name: statusengine

# Set the name of the current node
node.name: elastic01

#Path where Elasticsearch should store data
path.data: /var/lib/elasticsearch

#Path where Elasticsearch should store log files
path.logs: /var/log/elasticsearch
If one of the listed options is missing in your default config, just add it .
Start Elasticsearch
systemctl enable elasticsearch.service
systemctl start elasticsearch.service
By default Elasticsearch will listen on localhost:9200 and localhost:9300.
You can change this or run an HTTP reverse proxy (for example nginx) in front of Elasticsearch.
(It could take up to 60 seconds until Elasticsearch will show up in netstat)
root@focal:~# netstat -tulpen | grep java
tcp6       0      0 127.0.0.1:9300          :::*                    LISTEN      115        102303     59333/java
tcp6       0      0 ::1:9300                :::*                    LISTEN      115        102286     59333/java
tcp6       0      0 127.0.0.1:9200          :::*                    LISTEN      115        102339     59333/java
tcp6       0      0 ::1:9200                :::*                    LISTEN      115        102338     59333/java
Test Elasticsearch
To check if your installation of Elasticsearch is running, you can run a simple status query against it.
curl -X GET "http://localhost:9200"
You should get an result like this:
{
  "name" : "elastic01",
  "cluster_name" : "statusengine",
  "cluster_uuid" : "p5bcuqK1TnWVhJu4asNAcw",
  "version" : {
    "number" : "7.11.1",
    "build_flavor" : "default",
    "build_type" : "deb",
    "build_hash" : "ff17057114c2199c9c1bbecc727003a907c0db7a",
    "build_date" : "2021-02-15T13:44:09.394032Z",
    "build_snapshot" : false,
    "lucene_version" : "8.7.0",
    "minimum_wire_compatibility_version" : "6.8.0",
    "minimum_index_compatibility_version" : "6.0.0-beta1"
  },
  "tagline" : "You Know, for Search"
}
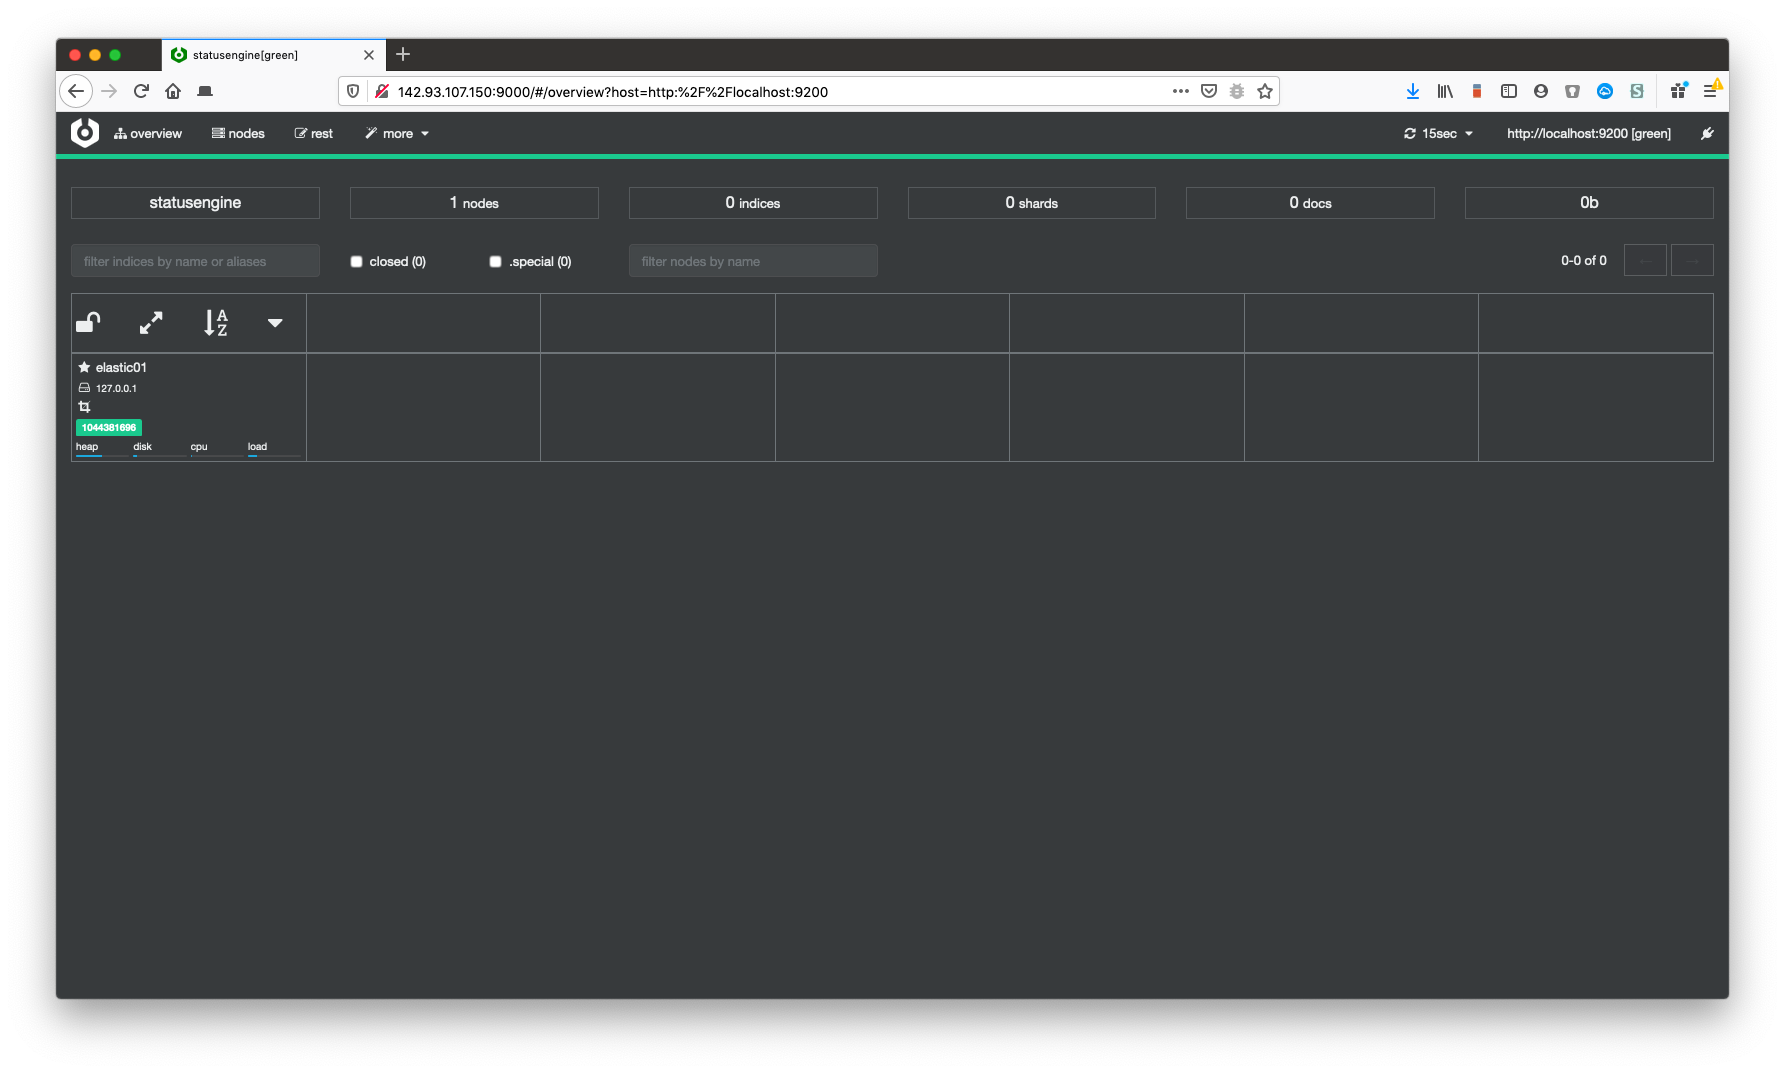
Setup Cerebro
Cerebro (previously known as kopf), is an web based admin tool for Elasticsearch. Especially if you are new to Elasticsearch it will help you a lot!
Before you start! Please check for newer version at the official GitHub repository!
apt-get install openjdk-14-jre

cd /tmp
wget https://github.com/lmenezes/cerebro/releases/download/v0.9.3/cerebro-0.9.3.tgz
tar xfv cerebro-0.9.3.tgz
cd cerebro-0.9.3/
mkdir -p /usr/local/share/cerebro
cp -r * /usr/local/share/cerebro/
Now you can run Cerebro using this command:
/usr/local/share/cerebro/bin/cerebro
You should now be able to access Cerebro via your Webbrowser: http://<ip-address>:9000
In addition, you can add a systemd service, to run Cerebro as service in the background.
Create the file /lib/systemd/system/cerebro.service:
[Unit]
Description=Cerebro
After=syslog.target network.target

[Service]
User=root
Type=simple
Restart=on-failure
ExecStart=/usr/local/share/cerebro/bin/cerebro

[Install]
WantedBy=multi-user.target
systemctl daemon-reload
systemctl start cerebro.service
Cerebro example