Setup a CrateDB 3 Node Cluster on Ubuntu behind HAProxy
How to install and setup a CrateDB 3 Node Cluster on Ubuntu 16.04 (Xenial)
Before you start! Please take a look at the official documentation! https://crate.io/docs/install/local/linux/
All commands needs to run as user root or via sudo.
Introduction
For this setup, you need four Nodes (Hardware or Virtual Machines).
Three nodes for CrateDB and one node as a load balancer via HAProxy.
Tip: Always use a odd number of CrateDB nodes, to avoid split brain situations!
CrateDB (as far as I know) has no authentication. To secure your installation you need a separate private network.
If you are using VirtualBox, you can add a second network interface as "Host-only" network, to get a new private network:
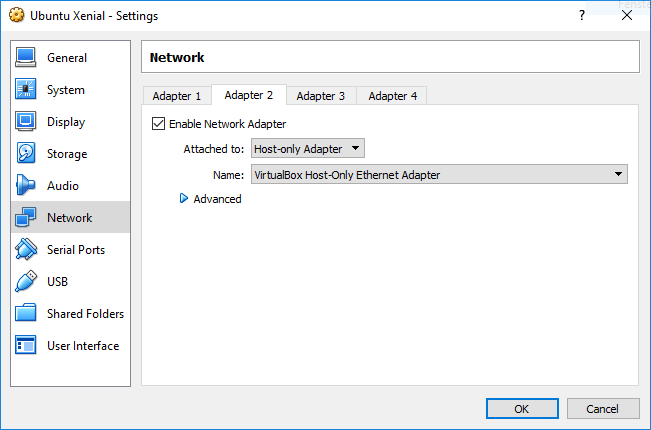
On a Bare-metal server add a new network interface or tag a V-LAN...
In this example, we are using the following IP addresses:
CrateDB Node 1
eth0 (External Network)
10.0.2.15

eth1 (Private Network)
10.135.17.247
CrateDB Node 2
eth0 (External Network)
10.0.2.16

eth1 (Private Network)
10.135.0.28
CrateDB Node 3
eth0 (External Network)
10.0.2.17

eth1 (Private Network)
10.135.14.119
HAProxy Load Balancer
eth0 (External Network)
10.0.2.18

eth1 (Private Network)
10.135.15.152
Java required
CrateDB is an Java application.
If not already installed on all CraterDB nodes, here is a guid of how to install Oracle Java on Ubuntu.
Starting setup the first CrateDB node
Add the CrateDB repository
All commands needs to run as user root or via sudo.
wget -qO - https://cdn.crate.io/downloads/deb/DEB-GPG-KEY-crate | apt-key add -
echo "deb https://cdn.crate.io/downloads/deb/stable/ xenial main" > /etc/apt/sources.list.d/crate-stable.list
echo "deb-src https://cdn.crate.io/downloads/deb/stable/ xenial main" >> /etc/apt/sources.list.d/crate-stable.list
apt-get update
apt-get install crate python
Configure the node
Unfortunately I sometimes need to force CrateDB to use IPv4 to get networking up and running.
echo "CRATE_USE_IPV4=true" >> /etc/default/crate
The rest of the configuration is done in the file
/etc/crate/crate.yml
Please keep in mind, that you need to modify the IP addresses, to fit your environment.
Open the file /etc/crate/crate.yml and set the following values.
# Name of the Node, e.g. '$(hostname -s)'
node.name: "cratedb1"

# Crate can utilize multiple volumes in parallel,
# make sure to set the owner to 'crate:crate'
#path.data: /path/to/data1,/path/to/data2

# Recommended: The amount of Crate instances in the full cluster
gateway.expected_nodes: 3

# Recommended: More then half of the Crate instances in the full cluster
gateway.recover_after_nodes: 2
discovery.zen.minimum_master_nodes: 2

# Cluster discovery: Specify the hosts which will form the CrateDB cluster
discovery.zen.ping:
  unicast.hosts:
    - 10.135.17.247:4300
    - 10.135.0.28:4300
    - 10.135.14.119:4300

# Defines the time to wait before starting the recovery once the number
# of nodes defined in gateway.recover_after_nodes are started.
#
gateway.recover_after_time: 5m

# Setting this to `false` disables the Enterprise Edition of CrateDB.
license.enterprise: false

# Set the bind address specifically (IPv4, IPv6 or special value):
#
network.bind_host: 10.135.17.247

# Set the address other nodes will use to communicate with this node. If not
# set, it is automatically derived. It must point to an actual IP address.
#
network.publish_host: 10.135.17.247
Repeat this step on all CrateDB nodes
Please change the following values on every node:
node.name(e.g. cratedb1, cratedb2, ...)network.bind_host(the private ip address of the node)network.publish_host(the private ip address of the node)
All configuration values are also explained in the official documentation
Add an alias name to /etc/hosts (Not required)
To make your life a bit easier, I recommend you to add all private ip addresses
to the file /etc/hosts.
So you can access each node via ssh cratedb1 for example:
10.135.17.247 cratedb1
10.135.0.28 cratedb2
10.135.14.119 cratedb3

10.135.15.152 haproxy
Start CrateDB on all nodes
systemctl start crate
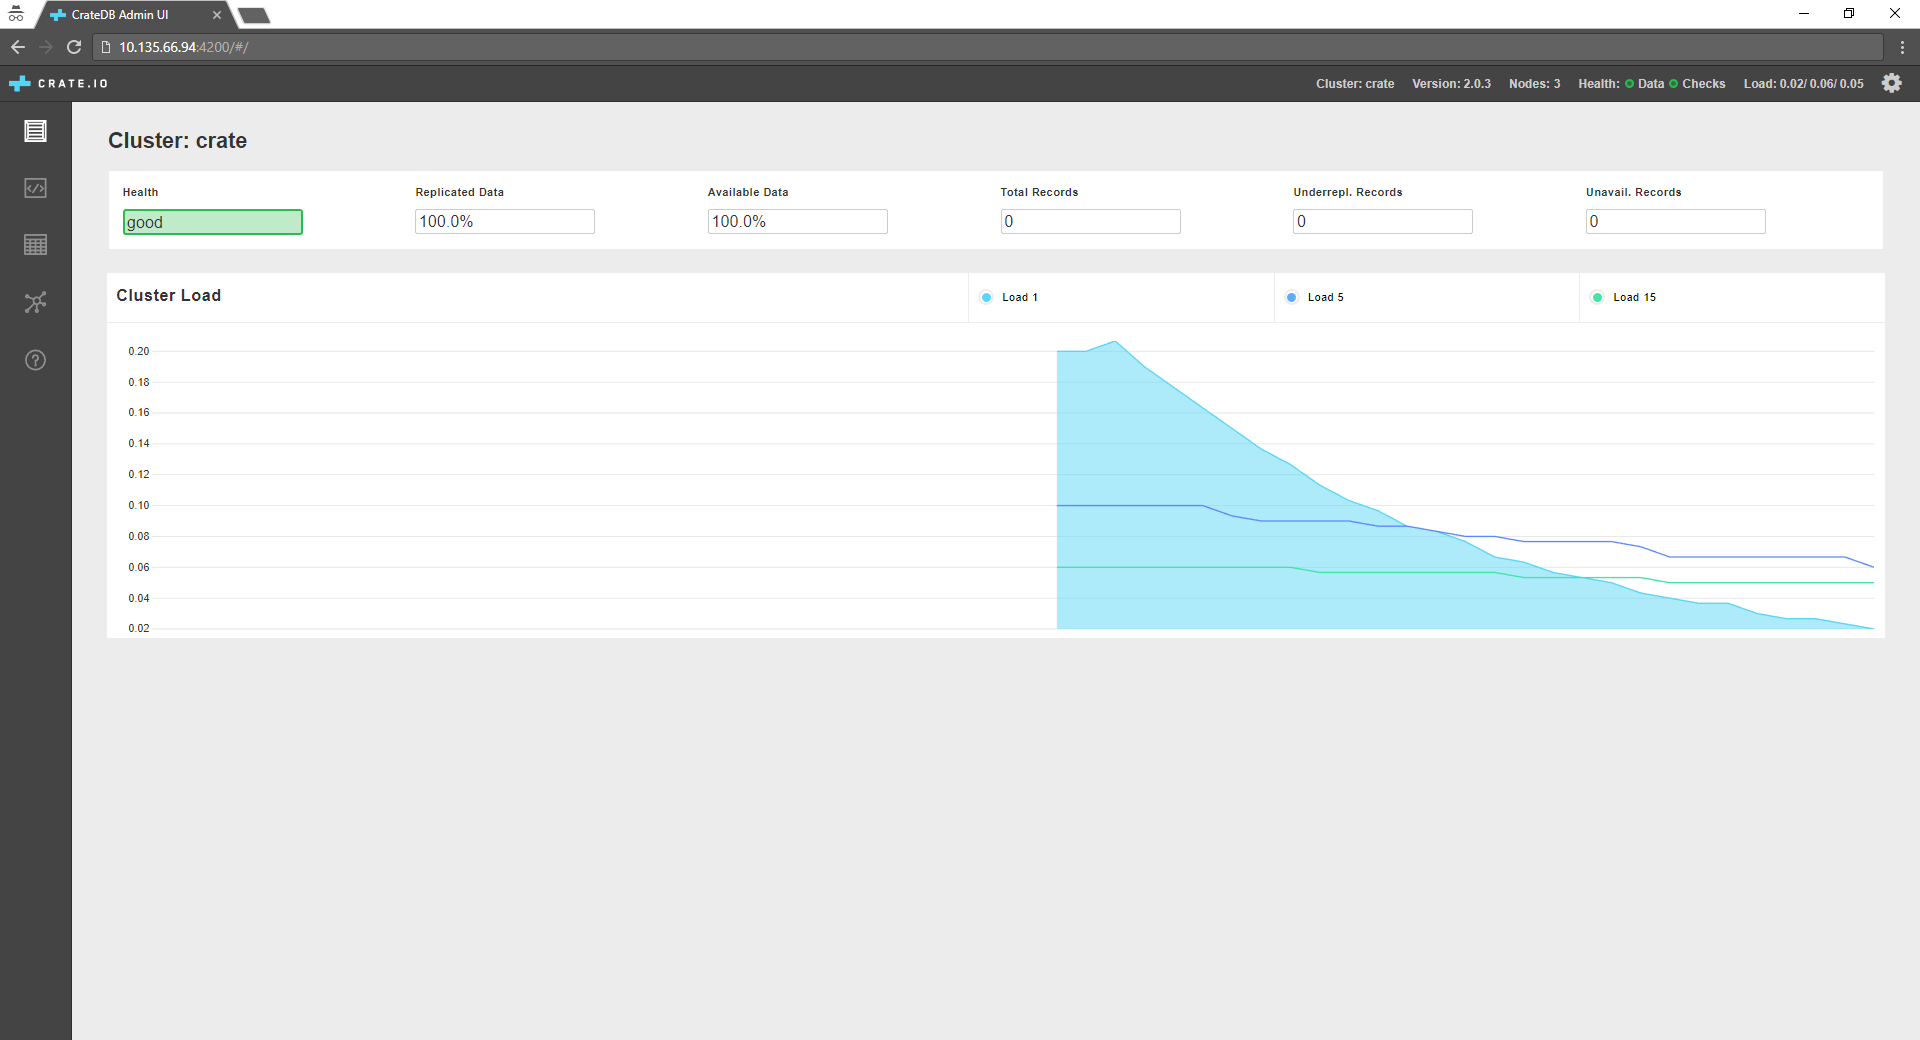
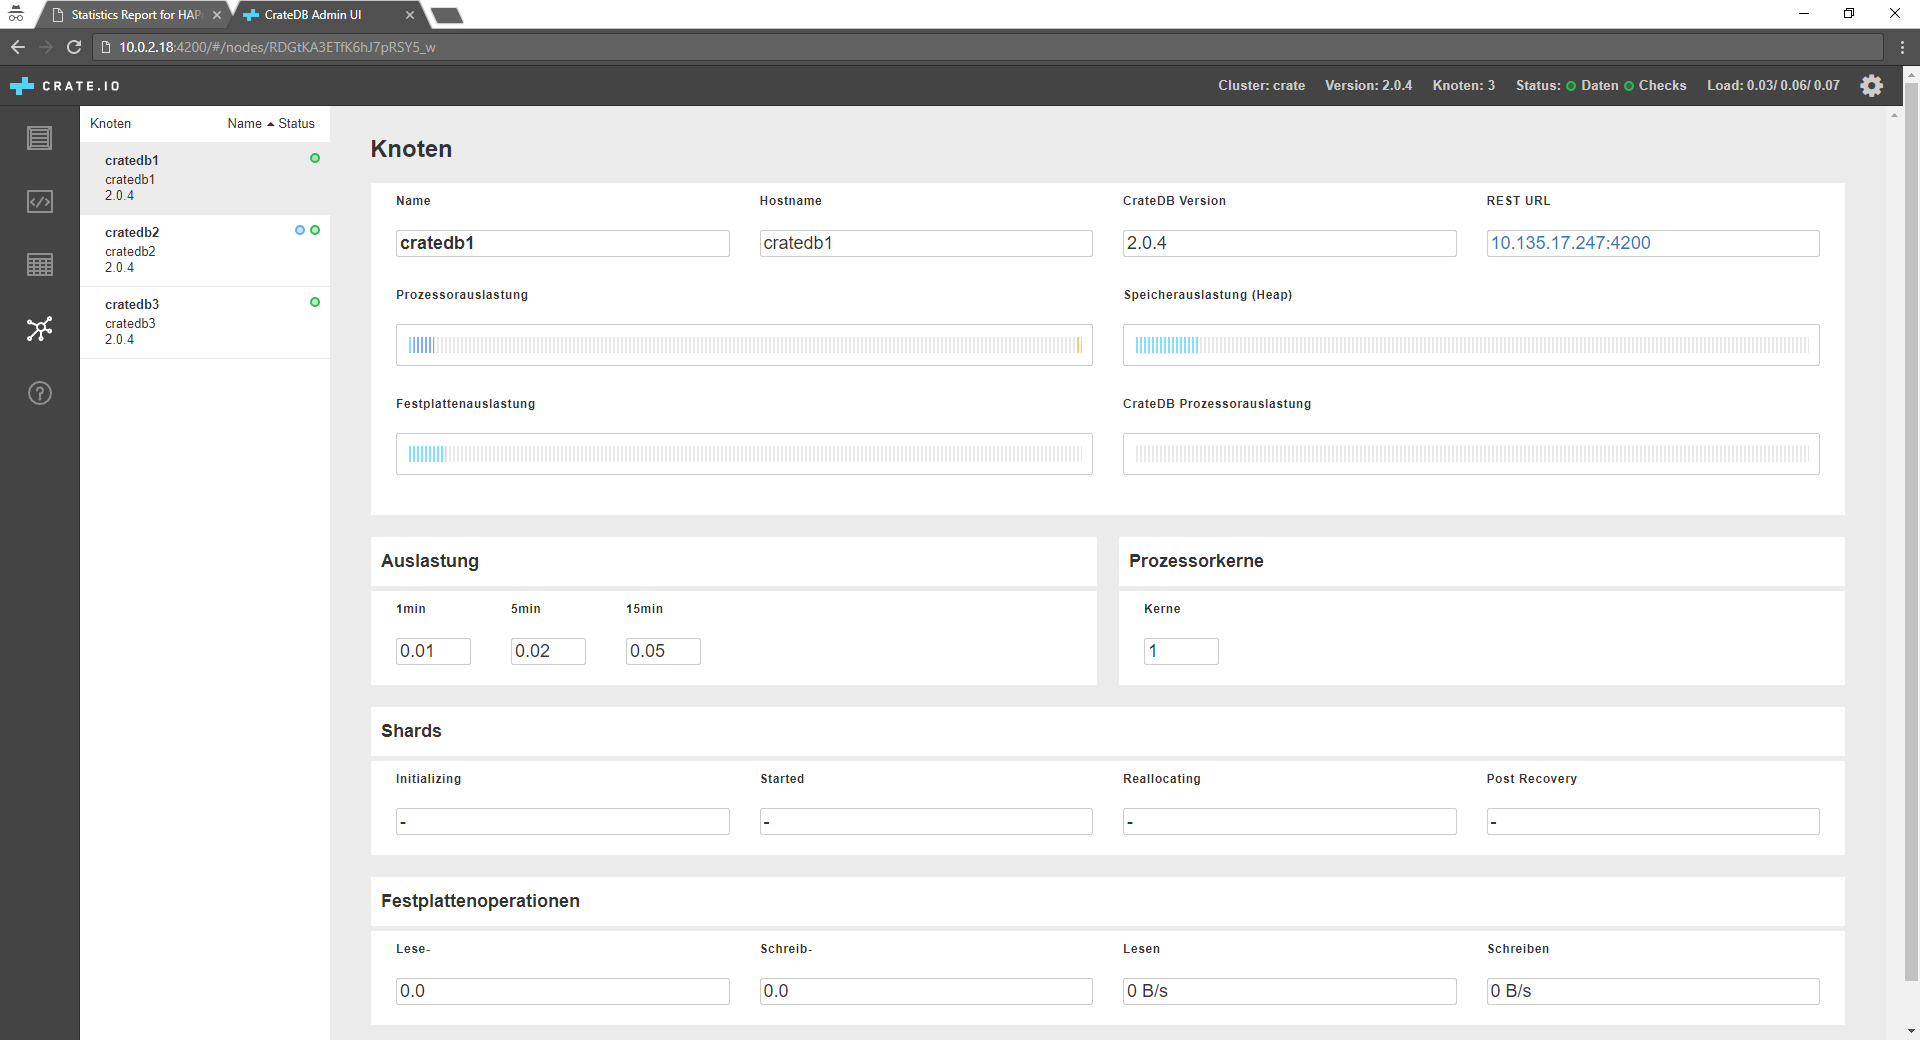
Access CrateDB Admin UI
To see, if everything is working as expected, you should browse to the CrateDB Admin Ui.
With this setup, the Admin UI is only reachable from the private network!
Open http://10.135.17.247:4200 in your browser.
Replace 10.135.17.247 with an private ip address of one of your nodes.
SSH tunneling
If your PC is not part of the private network, you can use some SSH magic
ssh -L 4200:10.135.17.247:4200 root@10.0.2.15Go to http://127.0.0.1:4200 in your browser.
10.135.17.247 is the private ip address of the node, where CrateDB is running.
10.0.2.15 is the external (or public) ip address of the node.
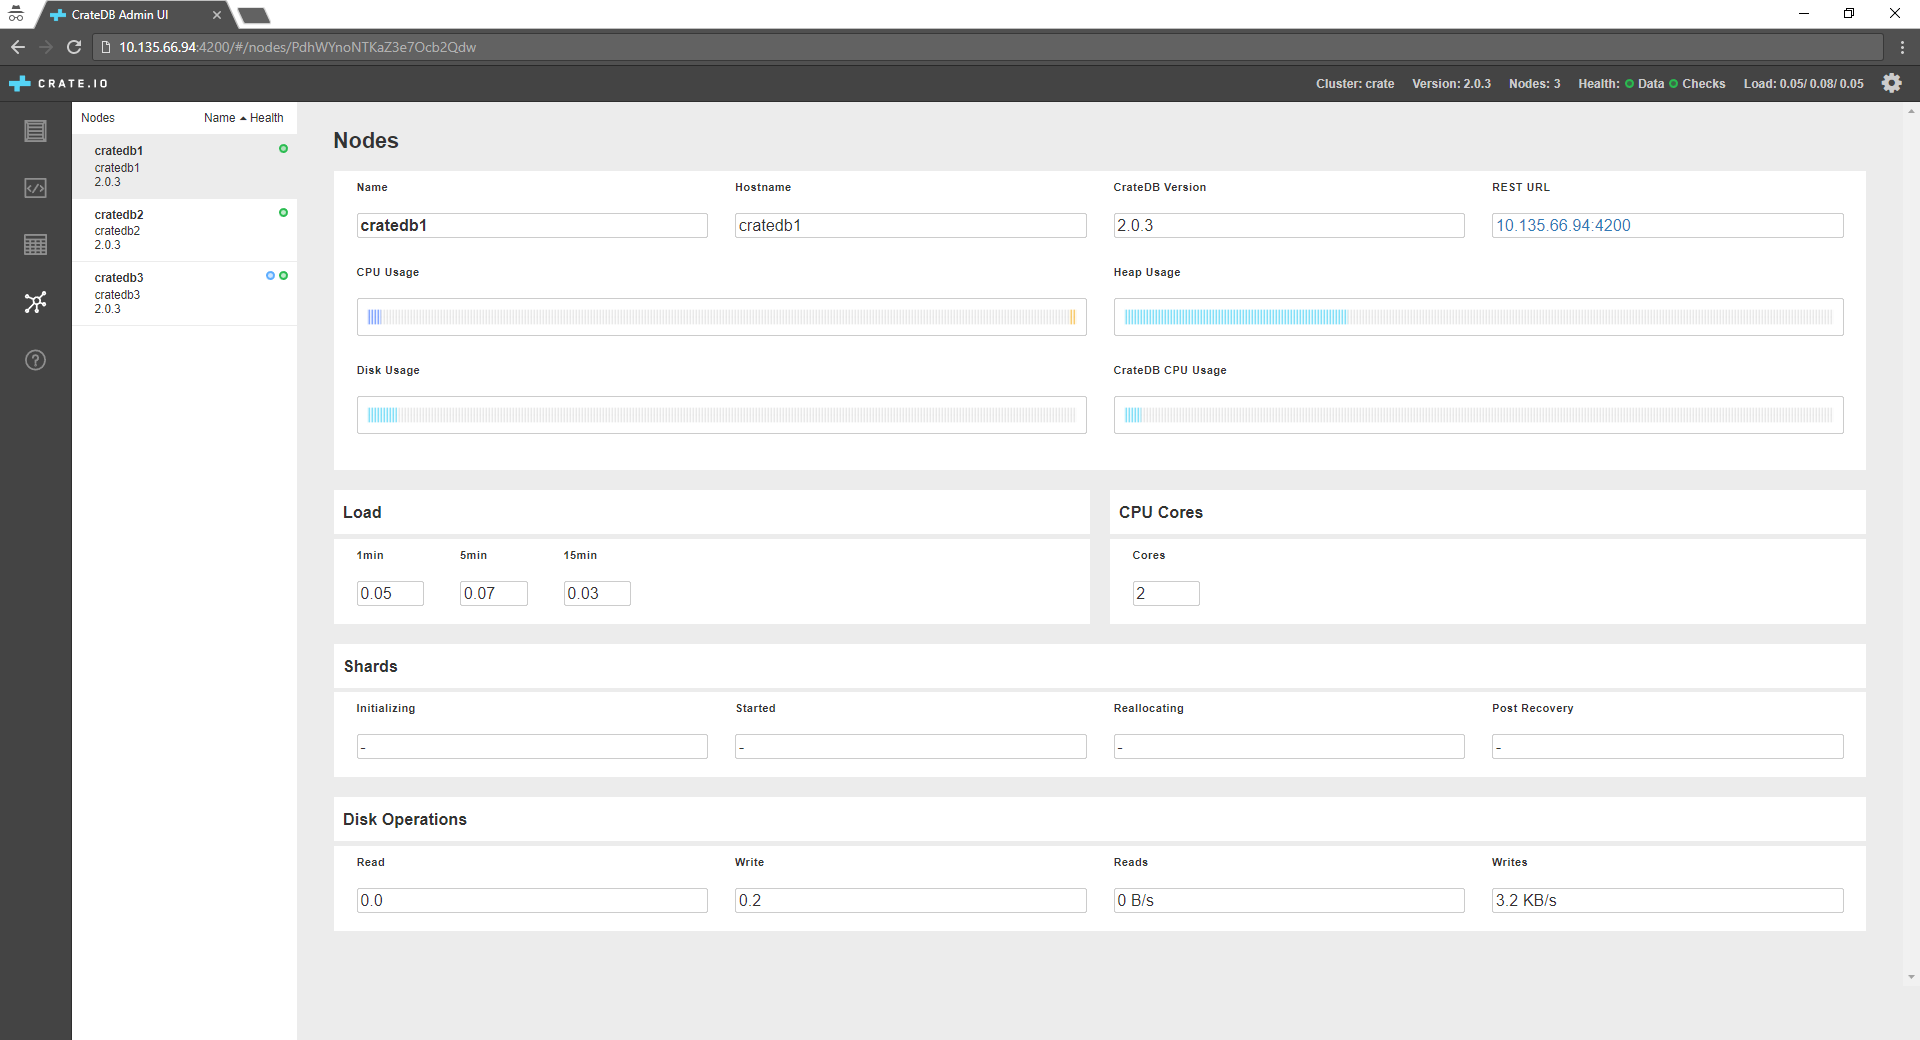
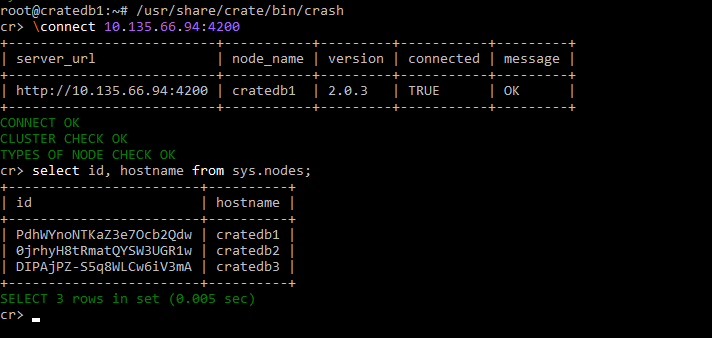
Make sure, all three nodes are connected to the cluster
Start CrateDB on reboot.
To make sure, that CrateDB gets started automatically after a reboot, enable it on every node.
systemctl enable crate
Setup HAProxy
Why HAProxy?
We are going to using HAProxy as load balancer in front of your CrateDB cluster.
So you only have one static IP address, all your applications can use to connect to the CrateDB cluster.
In addition you can use HAProxy as a proxy between your private network, where the CrateDB cluster is running, and your company network.
The reason why I use HAProxy, is the nice status page :) You can also use Ngnix or something else as load balancer...
Steps to go
apt-get install haproxy
Add the following to the end of the file /etc/haproxy/haproxy.cfg
Please keep in mind, that you need to modify the IP addresses, to fit your environment.
#Enable status page on all interfaces
listen stats
    bind *:80
    mode http
    stats enable
    stats hide-version
    stats realm Haproxy\ Statistics
    stats uri /
    #stats auth Username:Password

#Define the CrateDB cluster
#You can also use the DNS names, defined in /etc/hosts
backend crate-cluster
    balance roundrobin
    server cratedb1 10.135.17.247:4200 check
    server cratedb2 10.135.0.28:4200   check
    server cratedb3 10.135.14.119:4200 check

#HAProxy entry point
frontend http
    bind *:4200
    mode http

#Route all requests to the CrateDB cluster by default
default_backend crate-cluster
Restart HAProxy to enable the new configuration
systemctl enable haproxy
systemctl restart haproxy
Check HAProxy Status Page
To make sure, HAProxy was able to connect to all your CrateDB nodes, you can check the Status Page.
Browse to the public IP address of your HAProxy on Port 80.
In my case http://10.0.2.18
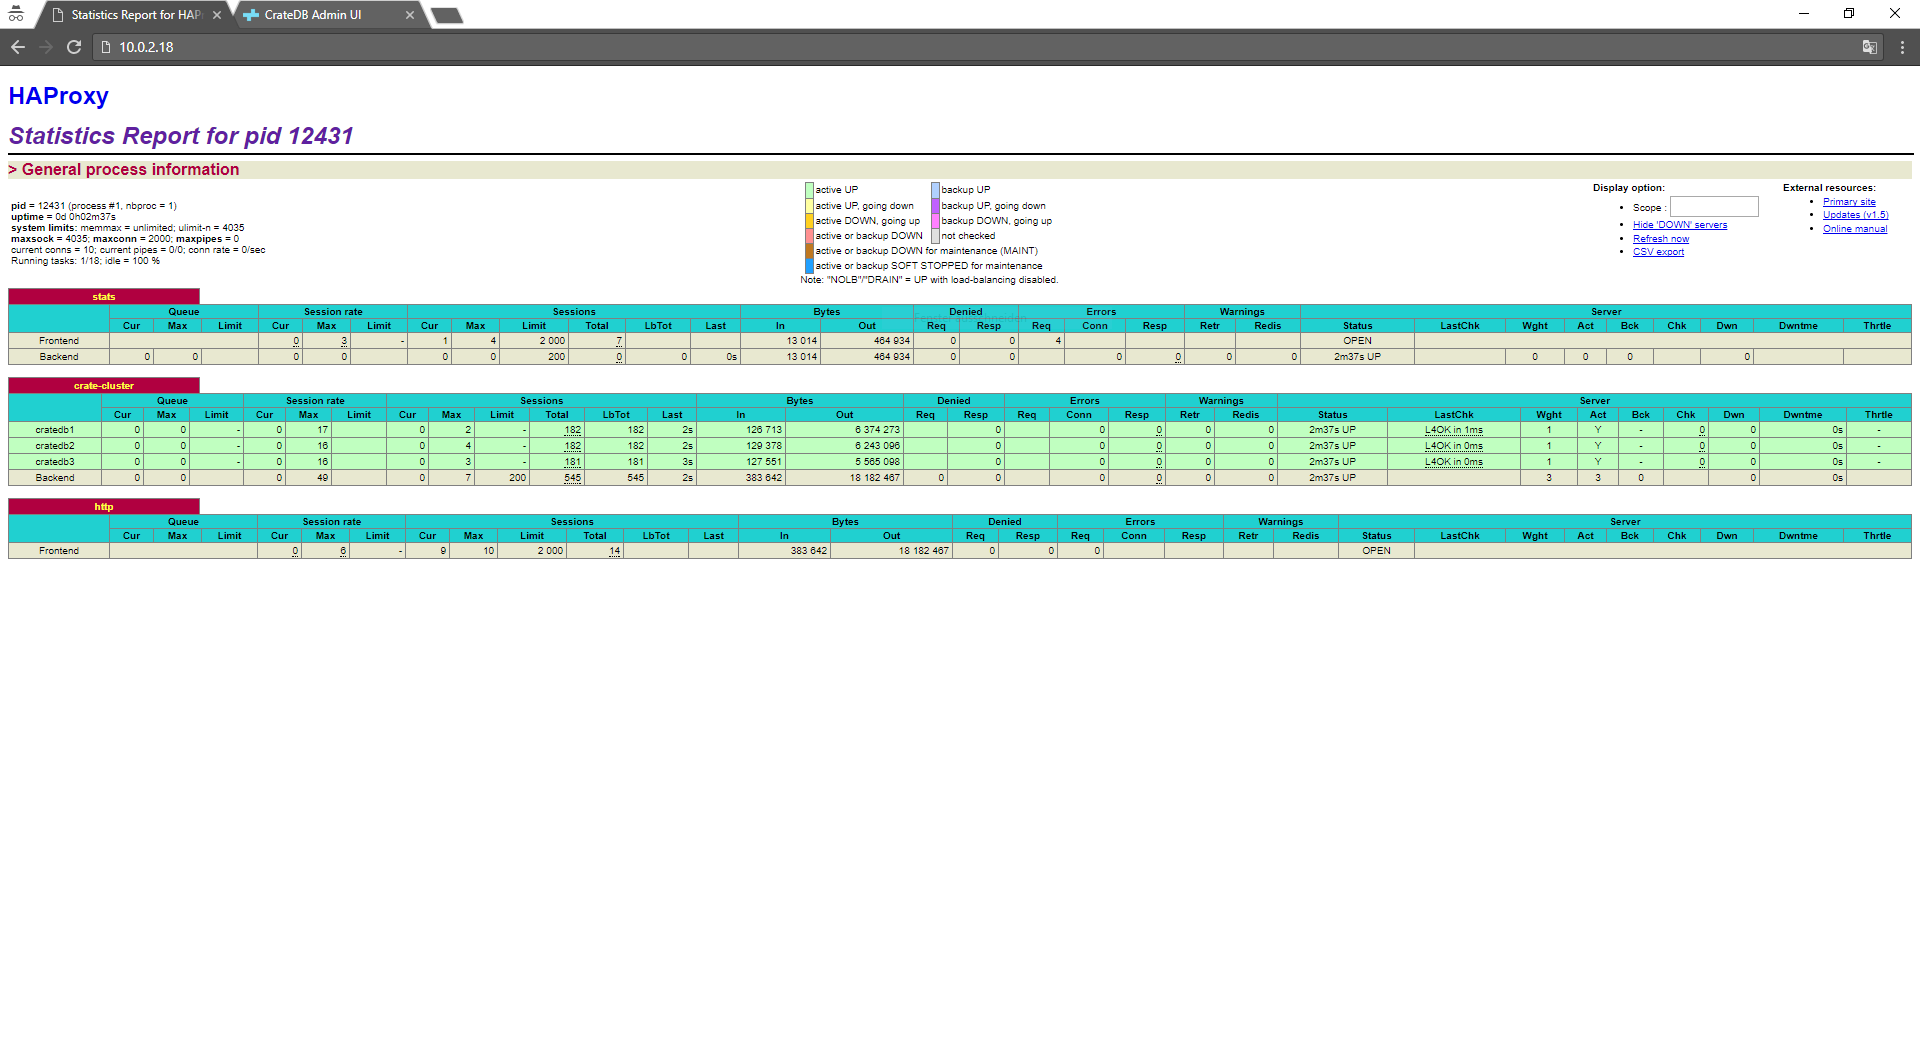
If you navigate to the port 4200 you should get the CrateDB Admin Ui.
http://10.0.2.18:4200
Always use the load balancer
I recommend you, to use the ip address of the load balancer for all applications, that want to connect to the CrateDB cluster.
CrateDB Shell crash
Crash is the name of the CrateDB CLI Shell.
/usr/share/crate/bin/crash
cr> \connect 10.135.17.247:4200
Check that CrateDB only listens on the private ip address
To make sure that your installation is save, you can use the command netstat -tulpen
to check that CrateDB only uses your private network
root@cratedb1:~# netstat -tulpen
Active Internet connections (only servers)
Proto Recv-Q Send-Q Local Address           Foreign Address         State       User       Inode       PID/Program name
tcp        0      0 10.135.17.247:4200      0.0.0.0:*               LISTEN      112        24022       5063/java
tcp        0      0 10.135.17.247:4300      0.0.0.0:*               LISTEN      112        24018       5063/java
tcp        0      0 0.0.0.0:22              0.0.0.0:*               LISTEN      0          15875       1596/sshd
tcp        0      0 10.135.17.247:5432      0.0.0.0:*               LISTEN      112        24009       5063/java
tcp6       0      0 :::22                   :::*                    LISTEN      0          15884       1596/sshd
root@cratedb1:~#
Congratulations
Your CrateDB cluster is ready to use :-)