Worker (PHP)
Overview
Statusengine Worker is a PHP application that consumes the events provided by the Statusengine Broker Module. All status data is stored in a database — CrateDB, MySQL or Redis. In addition, the worker parses and processes performance data to store it in a time series database such as Graphite.

Scale out to Multiple Nodes
If your workload grows and you split your monitoring configuration across multiple monitoring nodes, deploy a new instance of Statusengine Worker on every monitoring node in the cluster.
node_name for each Statusengine Worker in the
cluster. The default value of node_name is Crowbar.Requirements
- php >= 7.0
- Redis Server
- php redis extension
- php gearman extension
- php composer
Installation
Pick your operating system below. If yours is not listed, choose the version that matches it most closely — Statusengine still installs on systems that are not in the list.
1. Install dependencies
apt-get install git php-cli php-zip php-redis redis-server php-mysql php-json php-bcmath php-mbstring unzipThe php-gearman extension is missing or broken in Ubuntu 20.04 and has to be
installed manually.
apt-get install git php-cli php-zip php-redis redis-server php-mysql php-json php-gearman php-bcmath php-mbstring unzipapt-get install git php-cli php-zip php-redis redis-server php-mysql php-bcmath php-mbstring unzipThe php-gearman extension is missing or broken in Ubuntu 16.04 and has to be
installed manually.
apt-get install git php5-cli php5-redis redis-server php5-mysql php5-gearman unzipFirst load the EPEL repository for PHP 7.2:
yum install epel-release
yum install http://rpms.remirepo.net/enterprise/remi-release-7.rpm
yum check-update
yum install yum-utils
yum-config-manager --enable remi-php72
Then install the dependencies:
yum install git php-cli php-pecl-redis redis php-mysql php-pecl-gearman php-json php-bcmath php-mbstring php-process unzipStart and enable the Redis server:
systemctl start redis
systemctl enable redis
First load the EPEL repository for PHP 7.3:
yum install epel-release
yum install http://rpms.remirepo.net/enterprise/remi-release-8.rpm
yum check-update

dnf module reset php
dnf module install php:remi-7.3
Then install the dependencies:
yum install git php-cli php-pecl-redis redis php-mysql php-pecl-gearman php-json php-bcmath php-mbstring php-process unzipStart and enable the Redis server:
systemctl start redis
systemctl enable redis
2. Download and install
mkdir -p /opt/statusengine
cd /opt/statusengine
git clone https://github.com/statusengine/worker.git worker
cd /opt/statusengine/worker
chmod +x bin/*
composer install
Database
At this point you need to decide which database you prefer to use. For large
environments or high availability you should use CrateDB. For smaller systems,
or to keep things simple, go with MySQL.
MySQL
Create a MySQL database and user for Statusengine:
CREATE USER 'statusengine'@'localhost' IDENTIFIED BY 'password';
CREATE DATABASE IF NOT EXISTS `statusengine` DEFAULT CHARACTER SET utf8 DEFAULT COLLATE utf8_general_ci;
GRANT ALL PRIVILEGES ON `statusengine`.* TO 'statusengine'@'localhost';
Since Statusengine 3.7 the schema is managed automatically.
Only for versions before 3.7: load the schema manually now.
# -p statusengine does not mean that "statusengine" is the password!
# It is the name of the database.
mysql -u statusengine -p statusengine < /opt/statusengine/worker/lib/mysql.sql
CrateDB
Import the file /opt/statusengine/worker/lib/crateDB.sql via the Crate Admin UI.
CrateDB users have to manage the database schema manually, because of crate/crate-dbal#92 . With CrateDB you do not have to create a separate database or user for Statusengine.
Redis
Statusengine can also store live data, such as host and service status, in a Redis server. Read more in the In-memory section.
Configuration
The Statusengine Worker config file has a lot of options you may not need, so this is stripped down to the basics you have to change.
The worker can also be configured through environment variables , which is handy inside Docker.
If you are going to use CrateDB you can ignore all MySQL settings, and vice versa.
Copy the example configuration:
cp /opt/statusengine/worker/etc/config.yml.example /opt/statusengine/worker/etc/config.yml| Option | Description |
|---|---|
node_name | Used to route external commands to the corresponding monitoring node. Must be unique. |
use_mysql | Set to 1 to enable the MySQL backend. |
mysql → username | The user Statusengine will use to connect to the MySQL server. |
mysql → password | The password of the given MySQL user. |
mysql → database | Name of the MySQL database. |
use_crate | Set to 1 to enable the CrateDB backend. |
crate → nodes | An array of IP addresses of CrateDB instances. Put a load balancer in front of the cluster and add only its address. |
external_command_file | Path to your external command file (nagios.cmd / naemon.cmd). Since 3.7 the C++ broker module is used by default to submit external commands. |
Load the MySQL database schema:
/opt/statusengine/worker/bin/Console.php database --updateConfigure Performance Data
Statusengine Worker can store Nagios and Naemon performance data in different storage backends:
- CrateDB
- MySQL
- Elasticsearch 5.x, 6.x and 7.x
- Graphite
Start Statusengine Worker
cp /opt/statusengine/worker/lib/statusengine.service /lib/systemd/system/statusengine.servicePitfall! Add your database to the After= line in
/lib/systemd/system/statusengine.service.
With CrateDB, add crate.service:
After=syslog.target network.target gearman-job-server.service crate.serviceWith MySQL on Ubuntu, add mysql.service:
After=syslog.target network.target gearman-job-server.service mysql.serviceWith MySQL on CentOS 7 or 8:
After=syslog.target network.target gearmand.service mariadb.servicesystemctl daemon-reload
systemctl enable statusengine
systemctl start statusenginecp /opt/statusengine/worker/lib/statusengine.init /etc/init.d/statusengine
chmod +x /etc/init.d/statusenginePitfall! Add your database to the Required-Start line in
/etc/init.d/statusengine.
With CrateDB, add crate:
Required-Start: gearman-job-server crateWith MySQL, add mysql:
Required-Start: gearman-job-server mysqlupdate-rc.d statusengine defaults
service statusengine startAutomatically delete old data from database
The database cleanup cronjob should only run on one node of your cluster. You can run it on as many nodes as you want, but this increases the load on the system. If you want to run it on more than one node, schedule it at different times — for example at 01:00 on node1 and at 13:00 on node2.
echo "0 1 * * * /opt/statusengine/worker/bin/Console.php cleanup -q" > /etc/cron.d/statusengineHow long Statusengine keeps your data is defined in
/opt/statusengine/worker/etc/config.yml.
The parameter -q (or --quiet) is required when the job runs via crontab.
Otherwise crond sends the output of the script to your mail address, which can
get annoying.
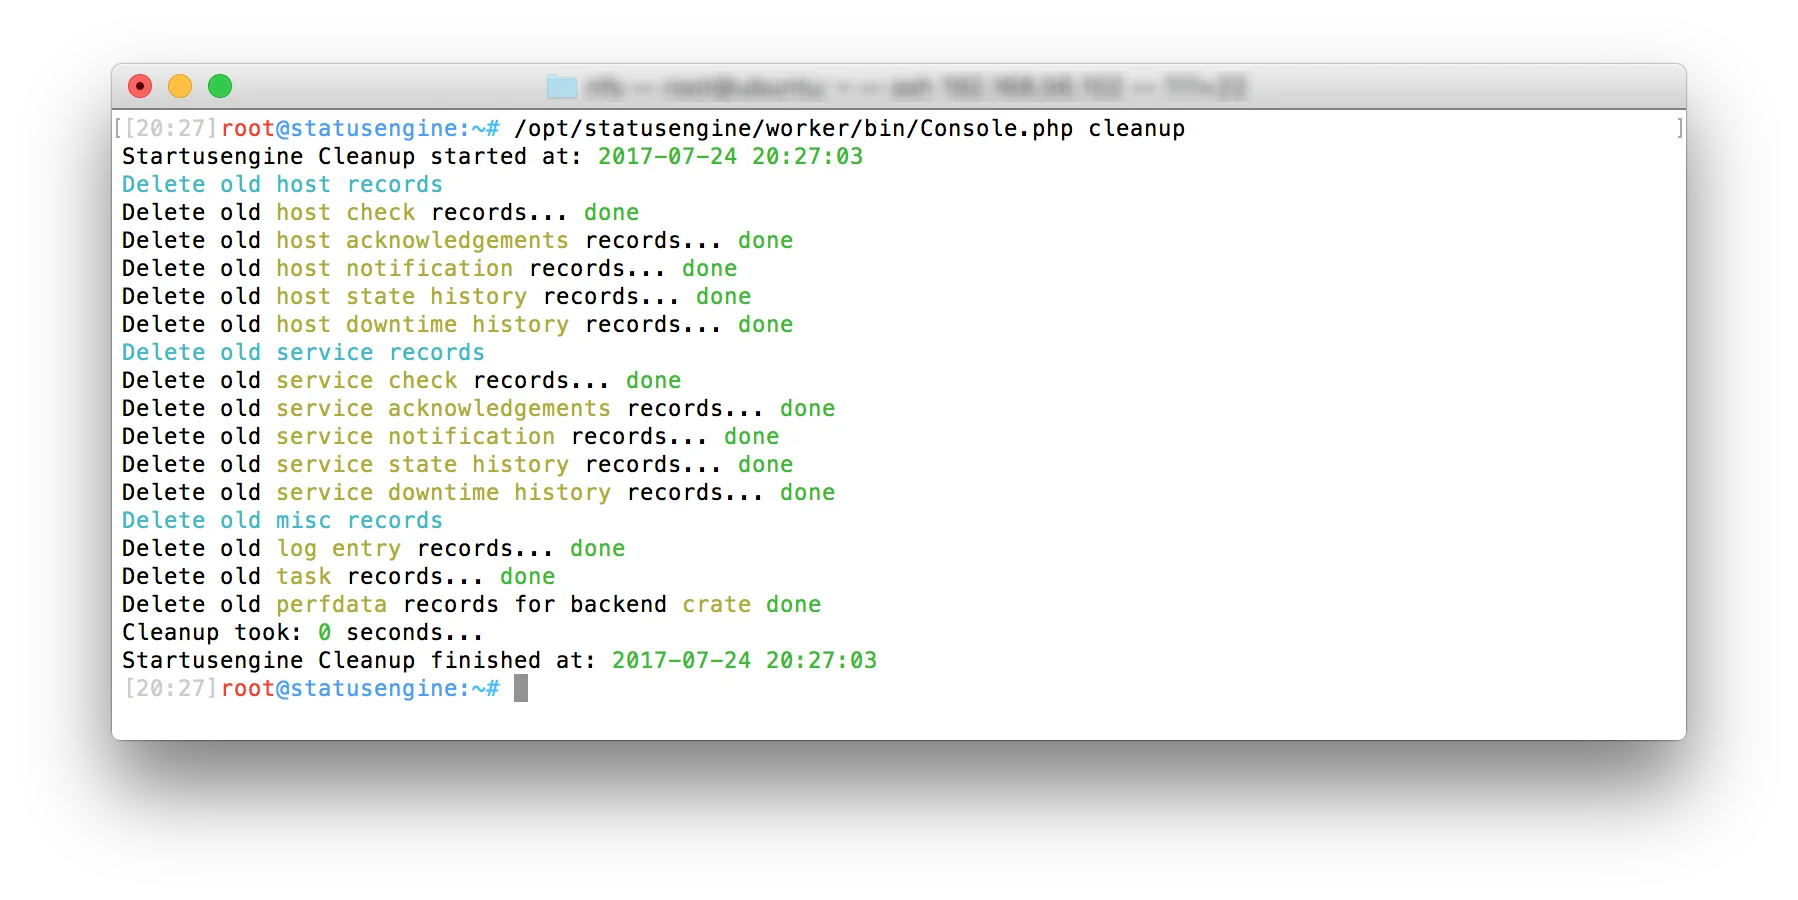
For debugging you can also run the cronjob yourself:
Manage Cluster Nodes
When you start a new Statusengine Worker node, it is added to the table
statusengine_nodes automatically. This is one of the reasons why node_name
has to be unique.
Removing a node from the cluster has to be done manually, using
/opt/statusengine/worker/bin/Console.php cluster.
To keep things automatable — with Ansible, for instance — you can pass all data
as parameters. Run the command without --nodename to get an interactive shell.
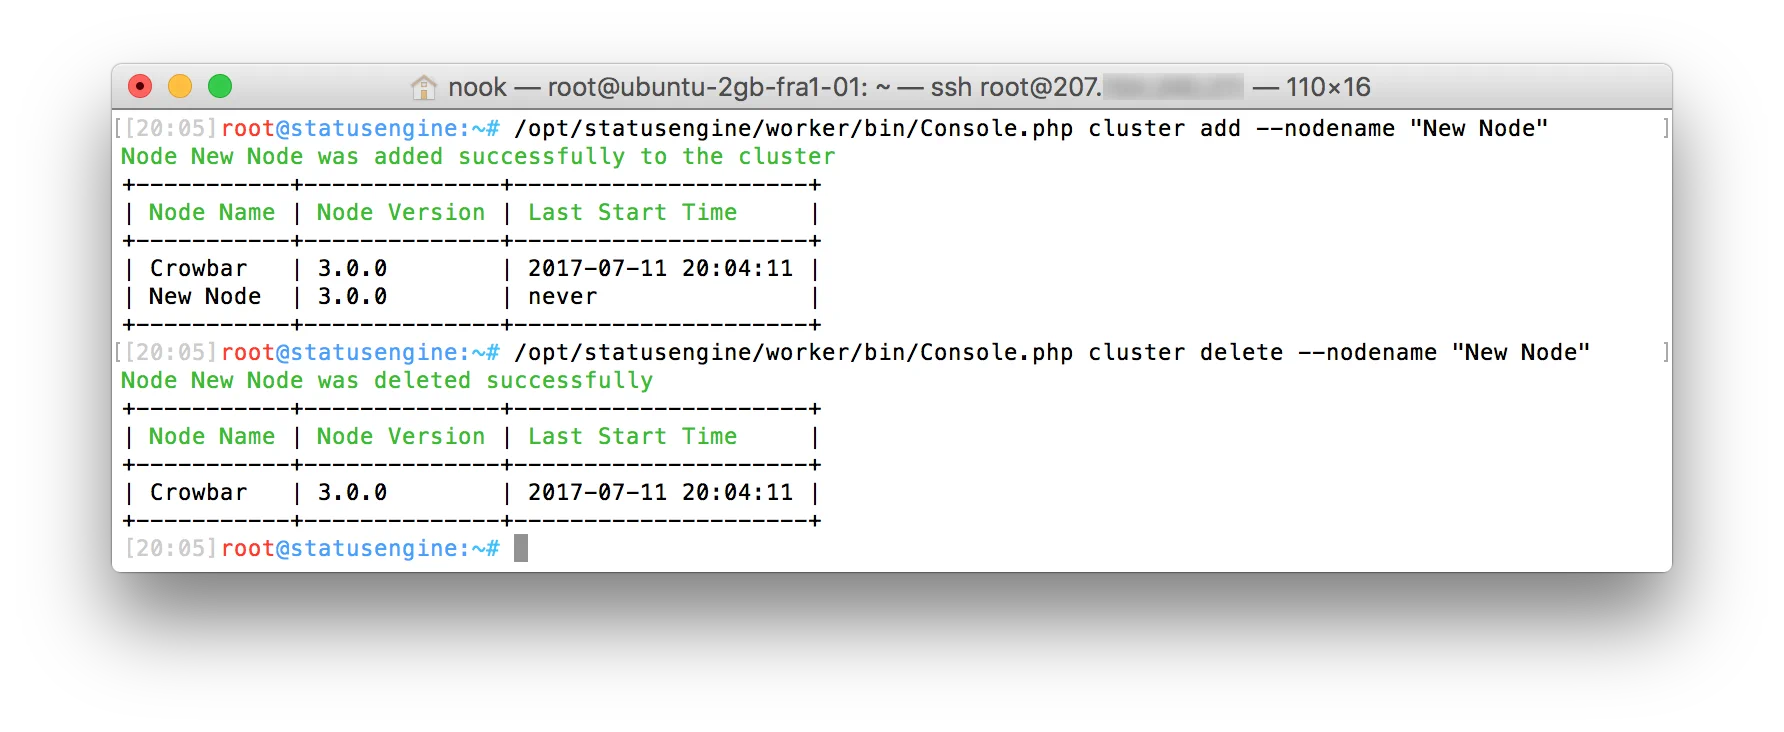
As always, --help is your friend.
Get Metrics
Statusengine Worker provides a simple CLI tool for basic metrics about worker performance. Run
/opt/statusengine/worker/bin/Console.php statisticsfor human-friendly output:
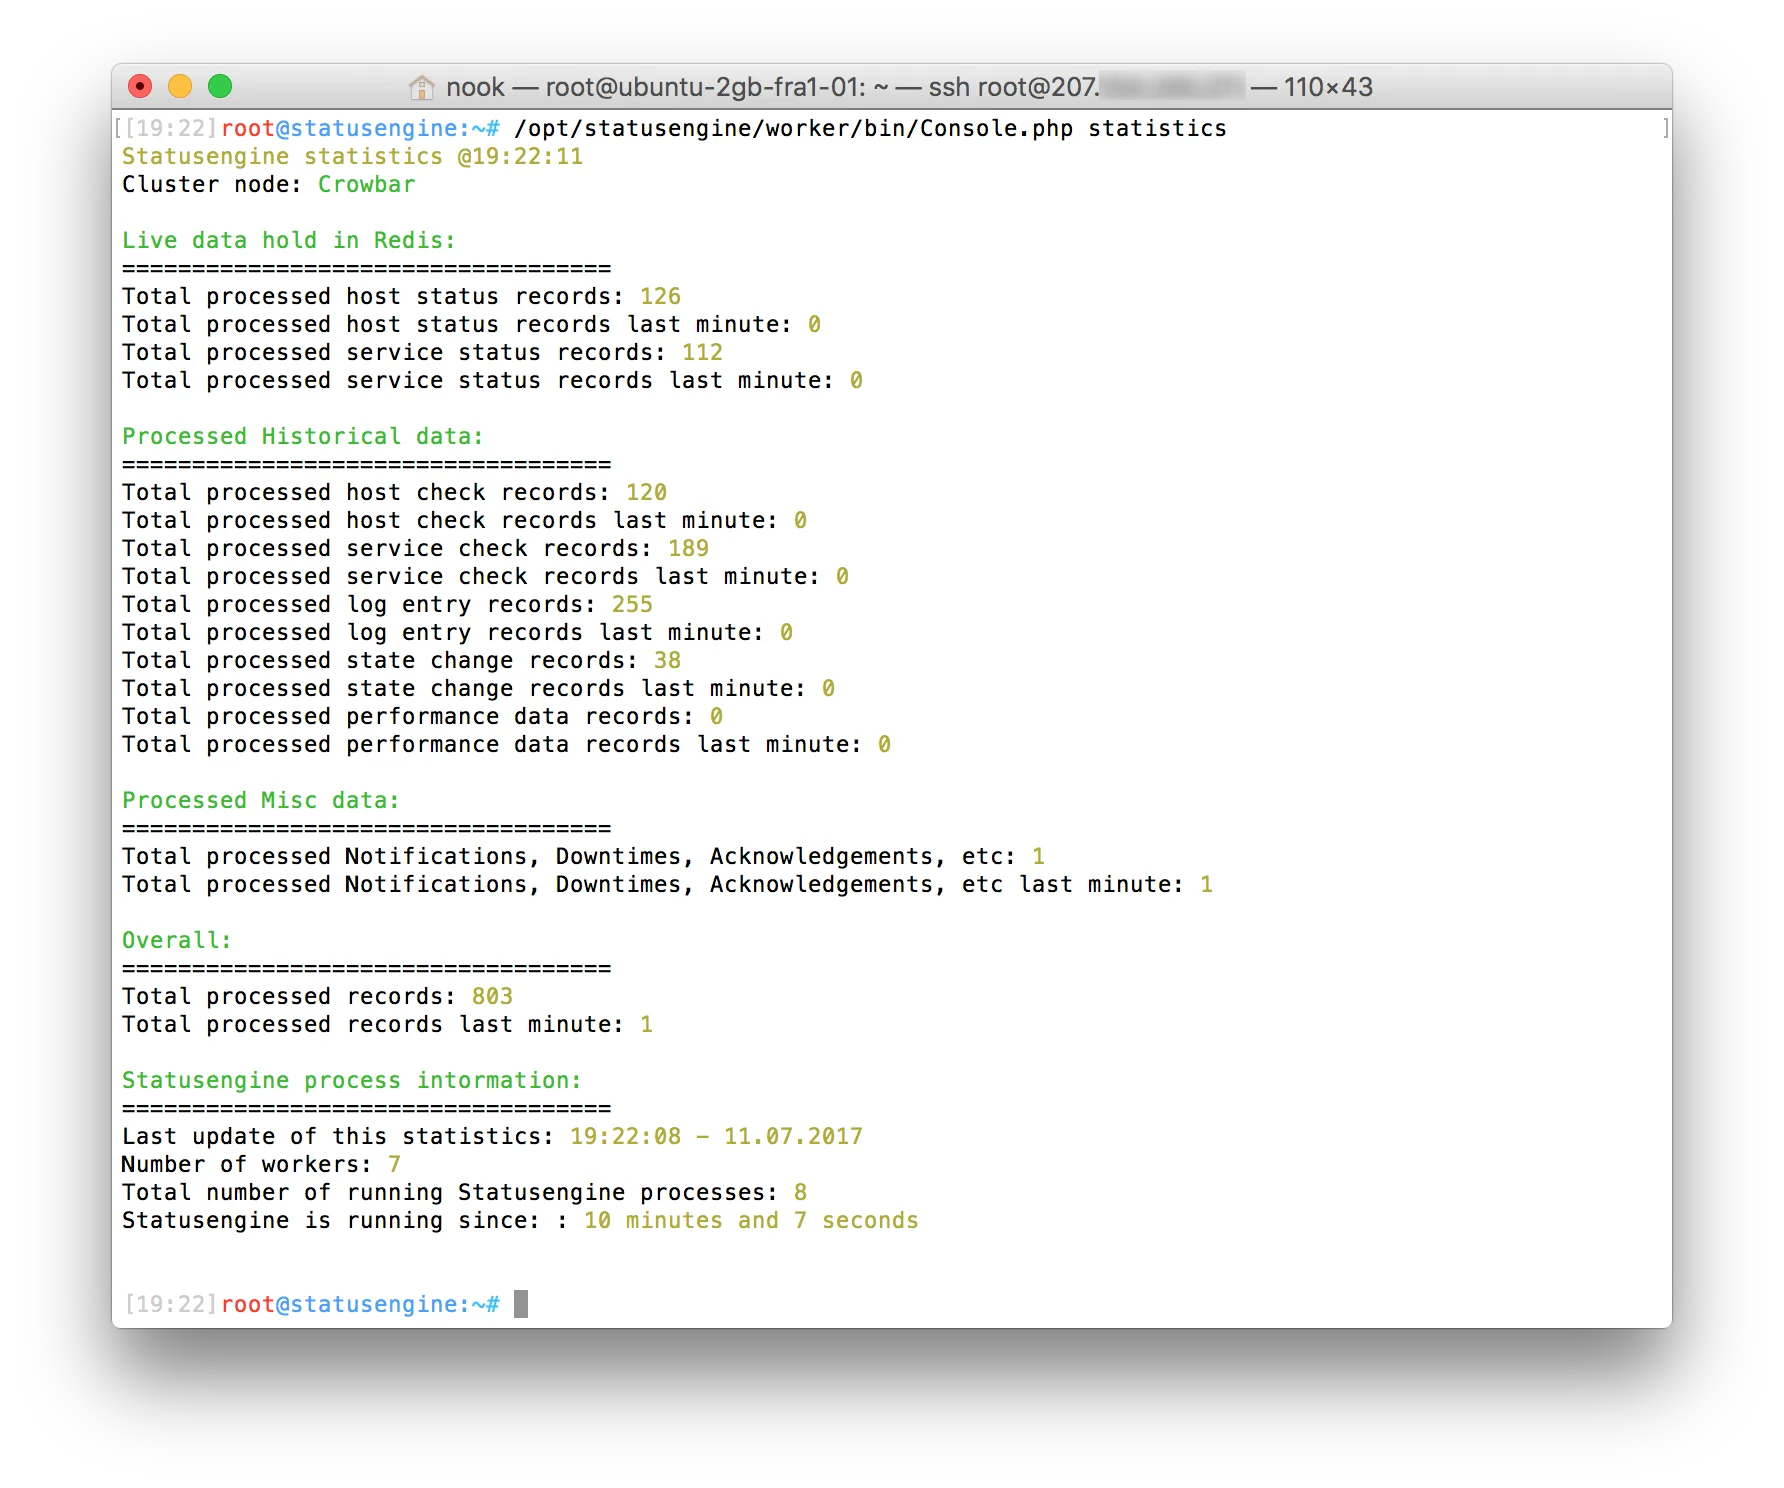
Add --watch 3 to refresh automatically every three seconds, or --naemon to
change the output format to Naemon/Nagios performance data:
/opt/statusengine/worker/bin/Console.php statistics --watch 3
/opt/statusengine/worker/bin/Console.php statistics --naemon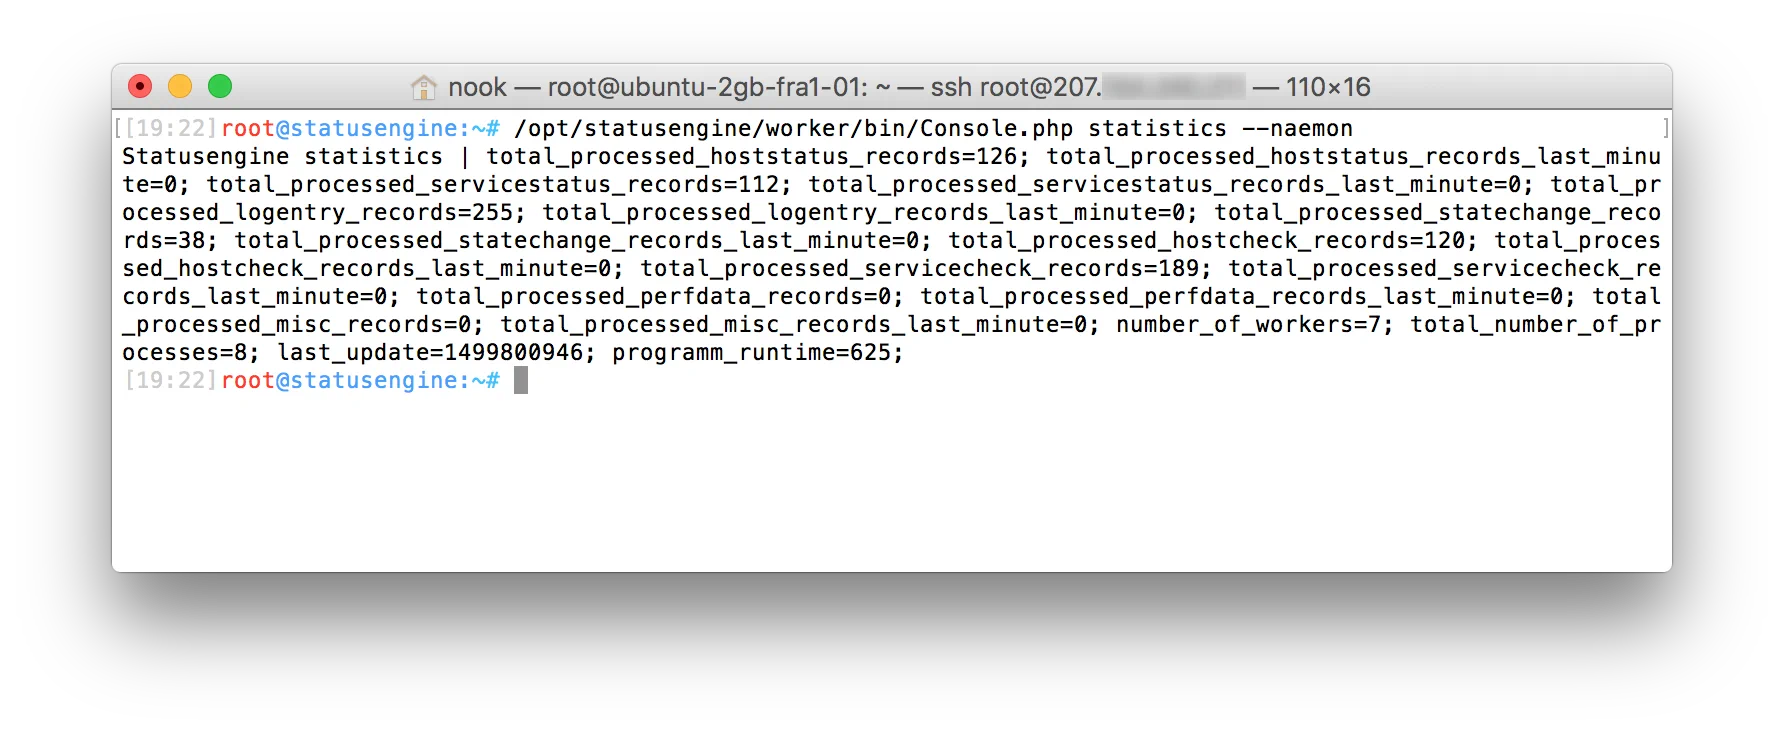
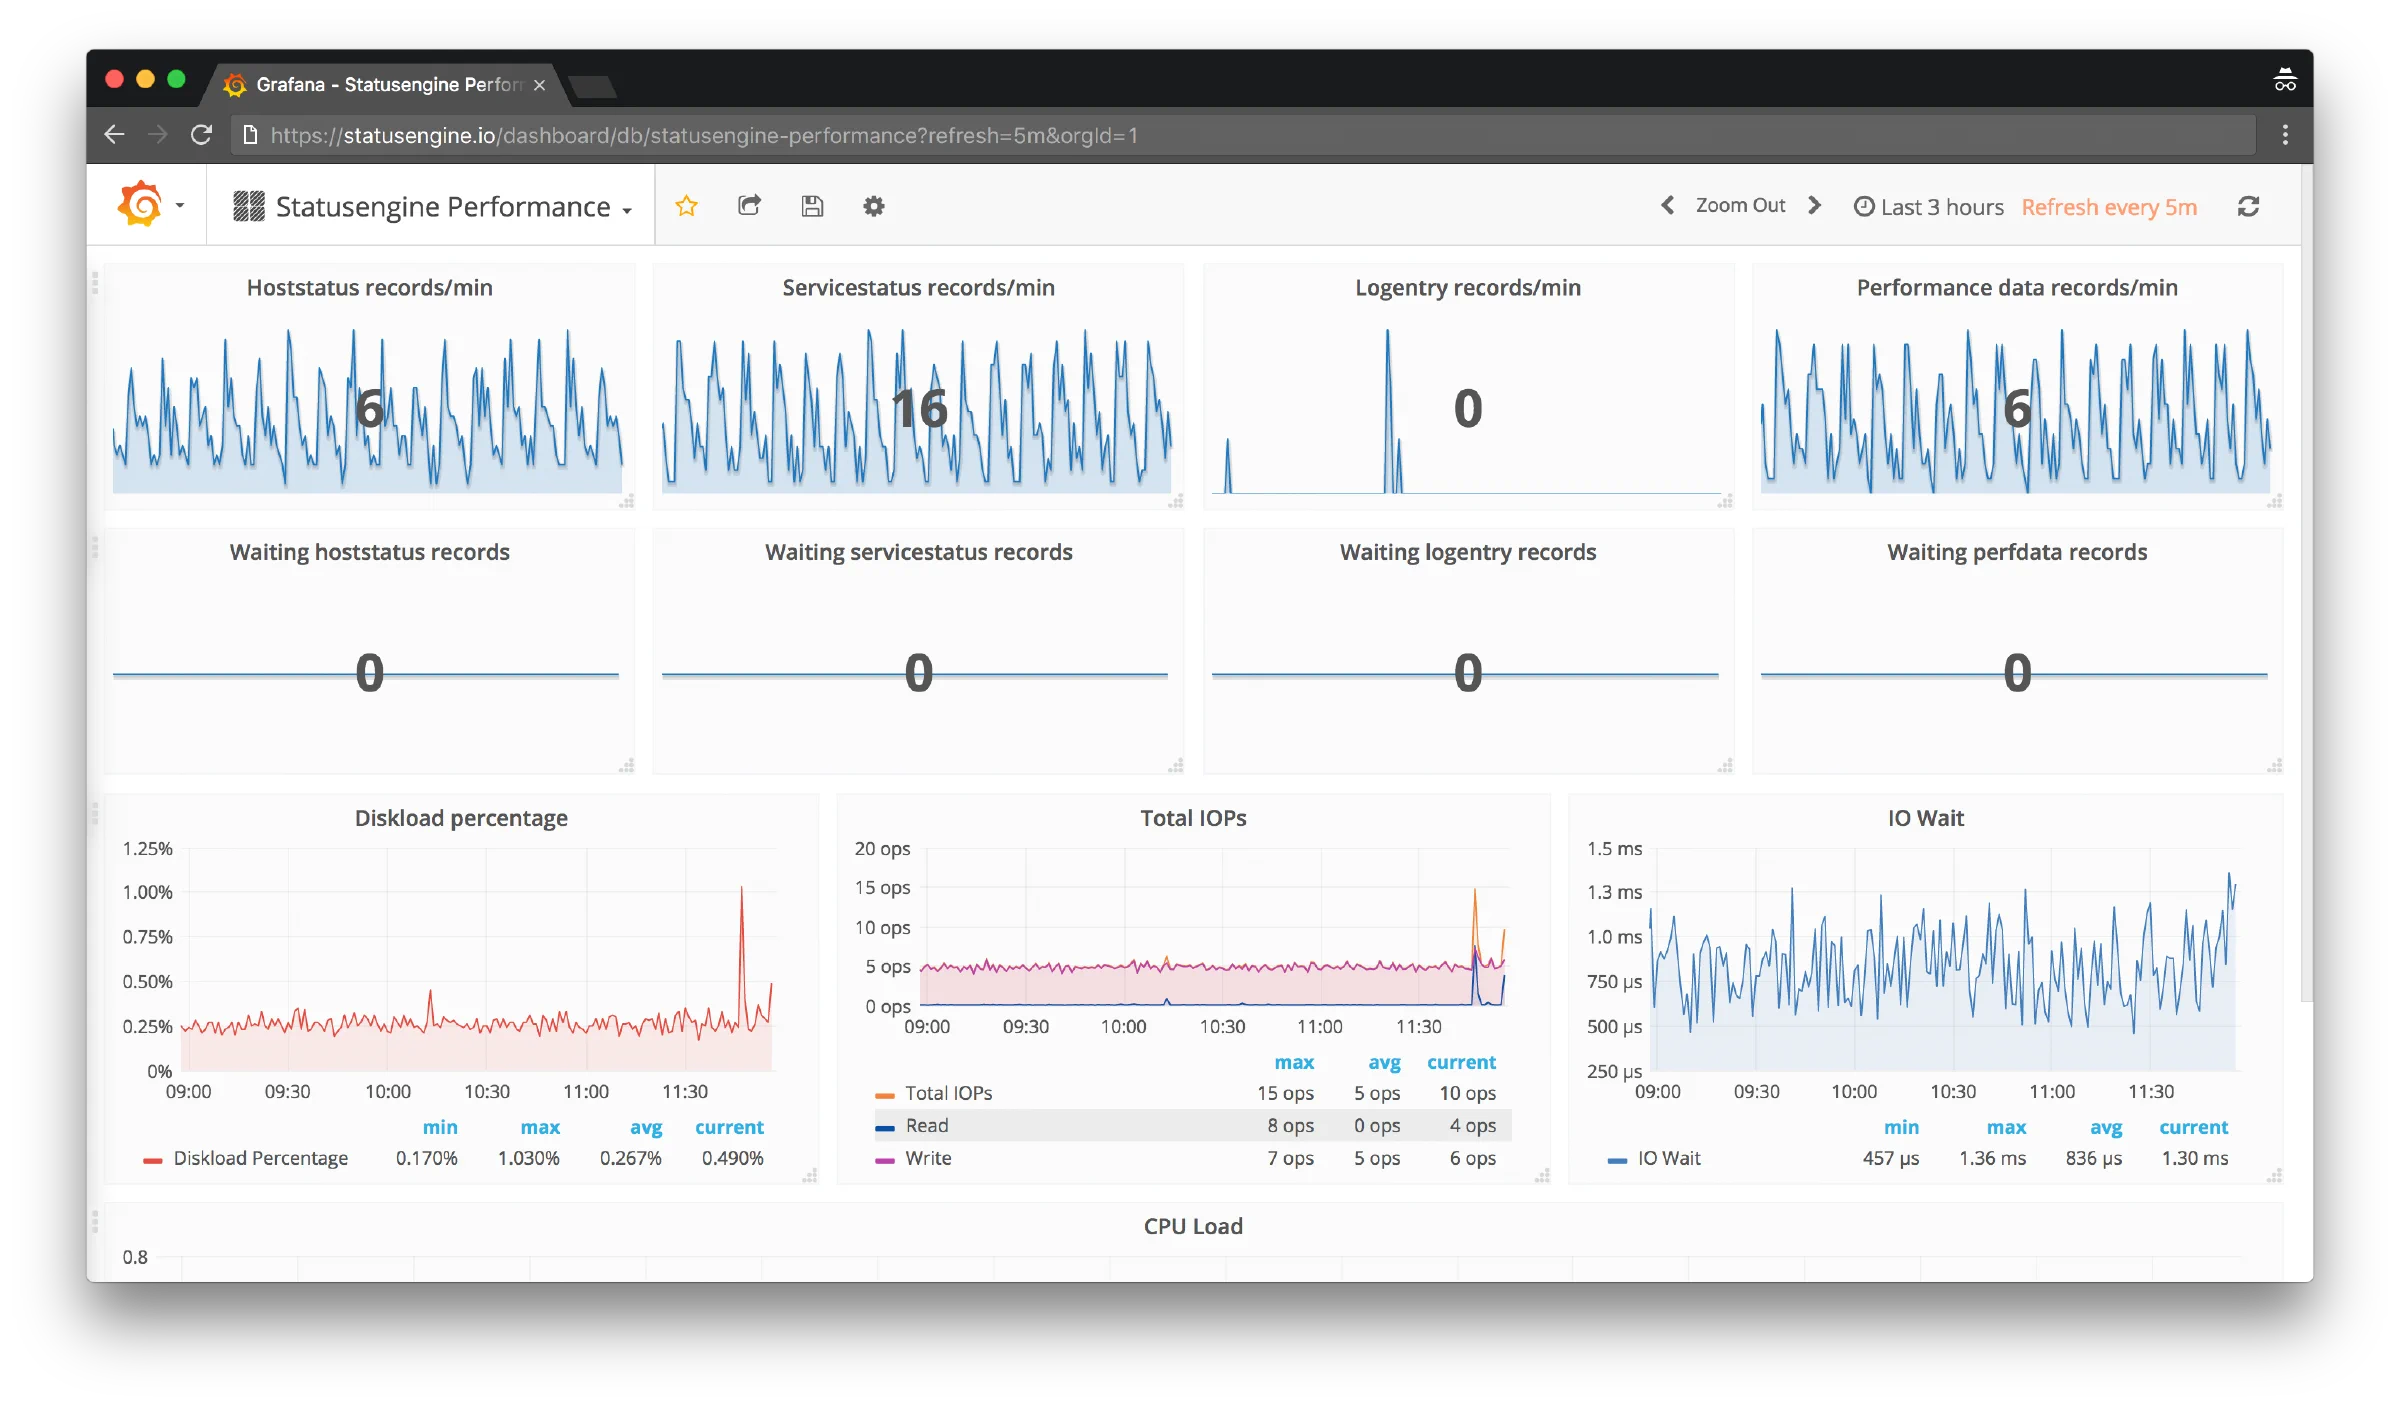
An example Grafana dashboard built from those metrics:
In-memory
Statusengine Worker can store live data in a Redis in-memory database. Use cases:
- Notification scripts — passing special characters such as
',"or&as a parameter can be a challenging task - Building a simple API on top
- Applications with heavy read operations
The following data is written to Redis:
- A list of hosts for every host state (
hosts_up,hosts_down,hosts_unreachable) - A list of services for every service state (
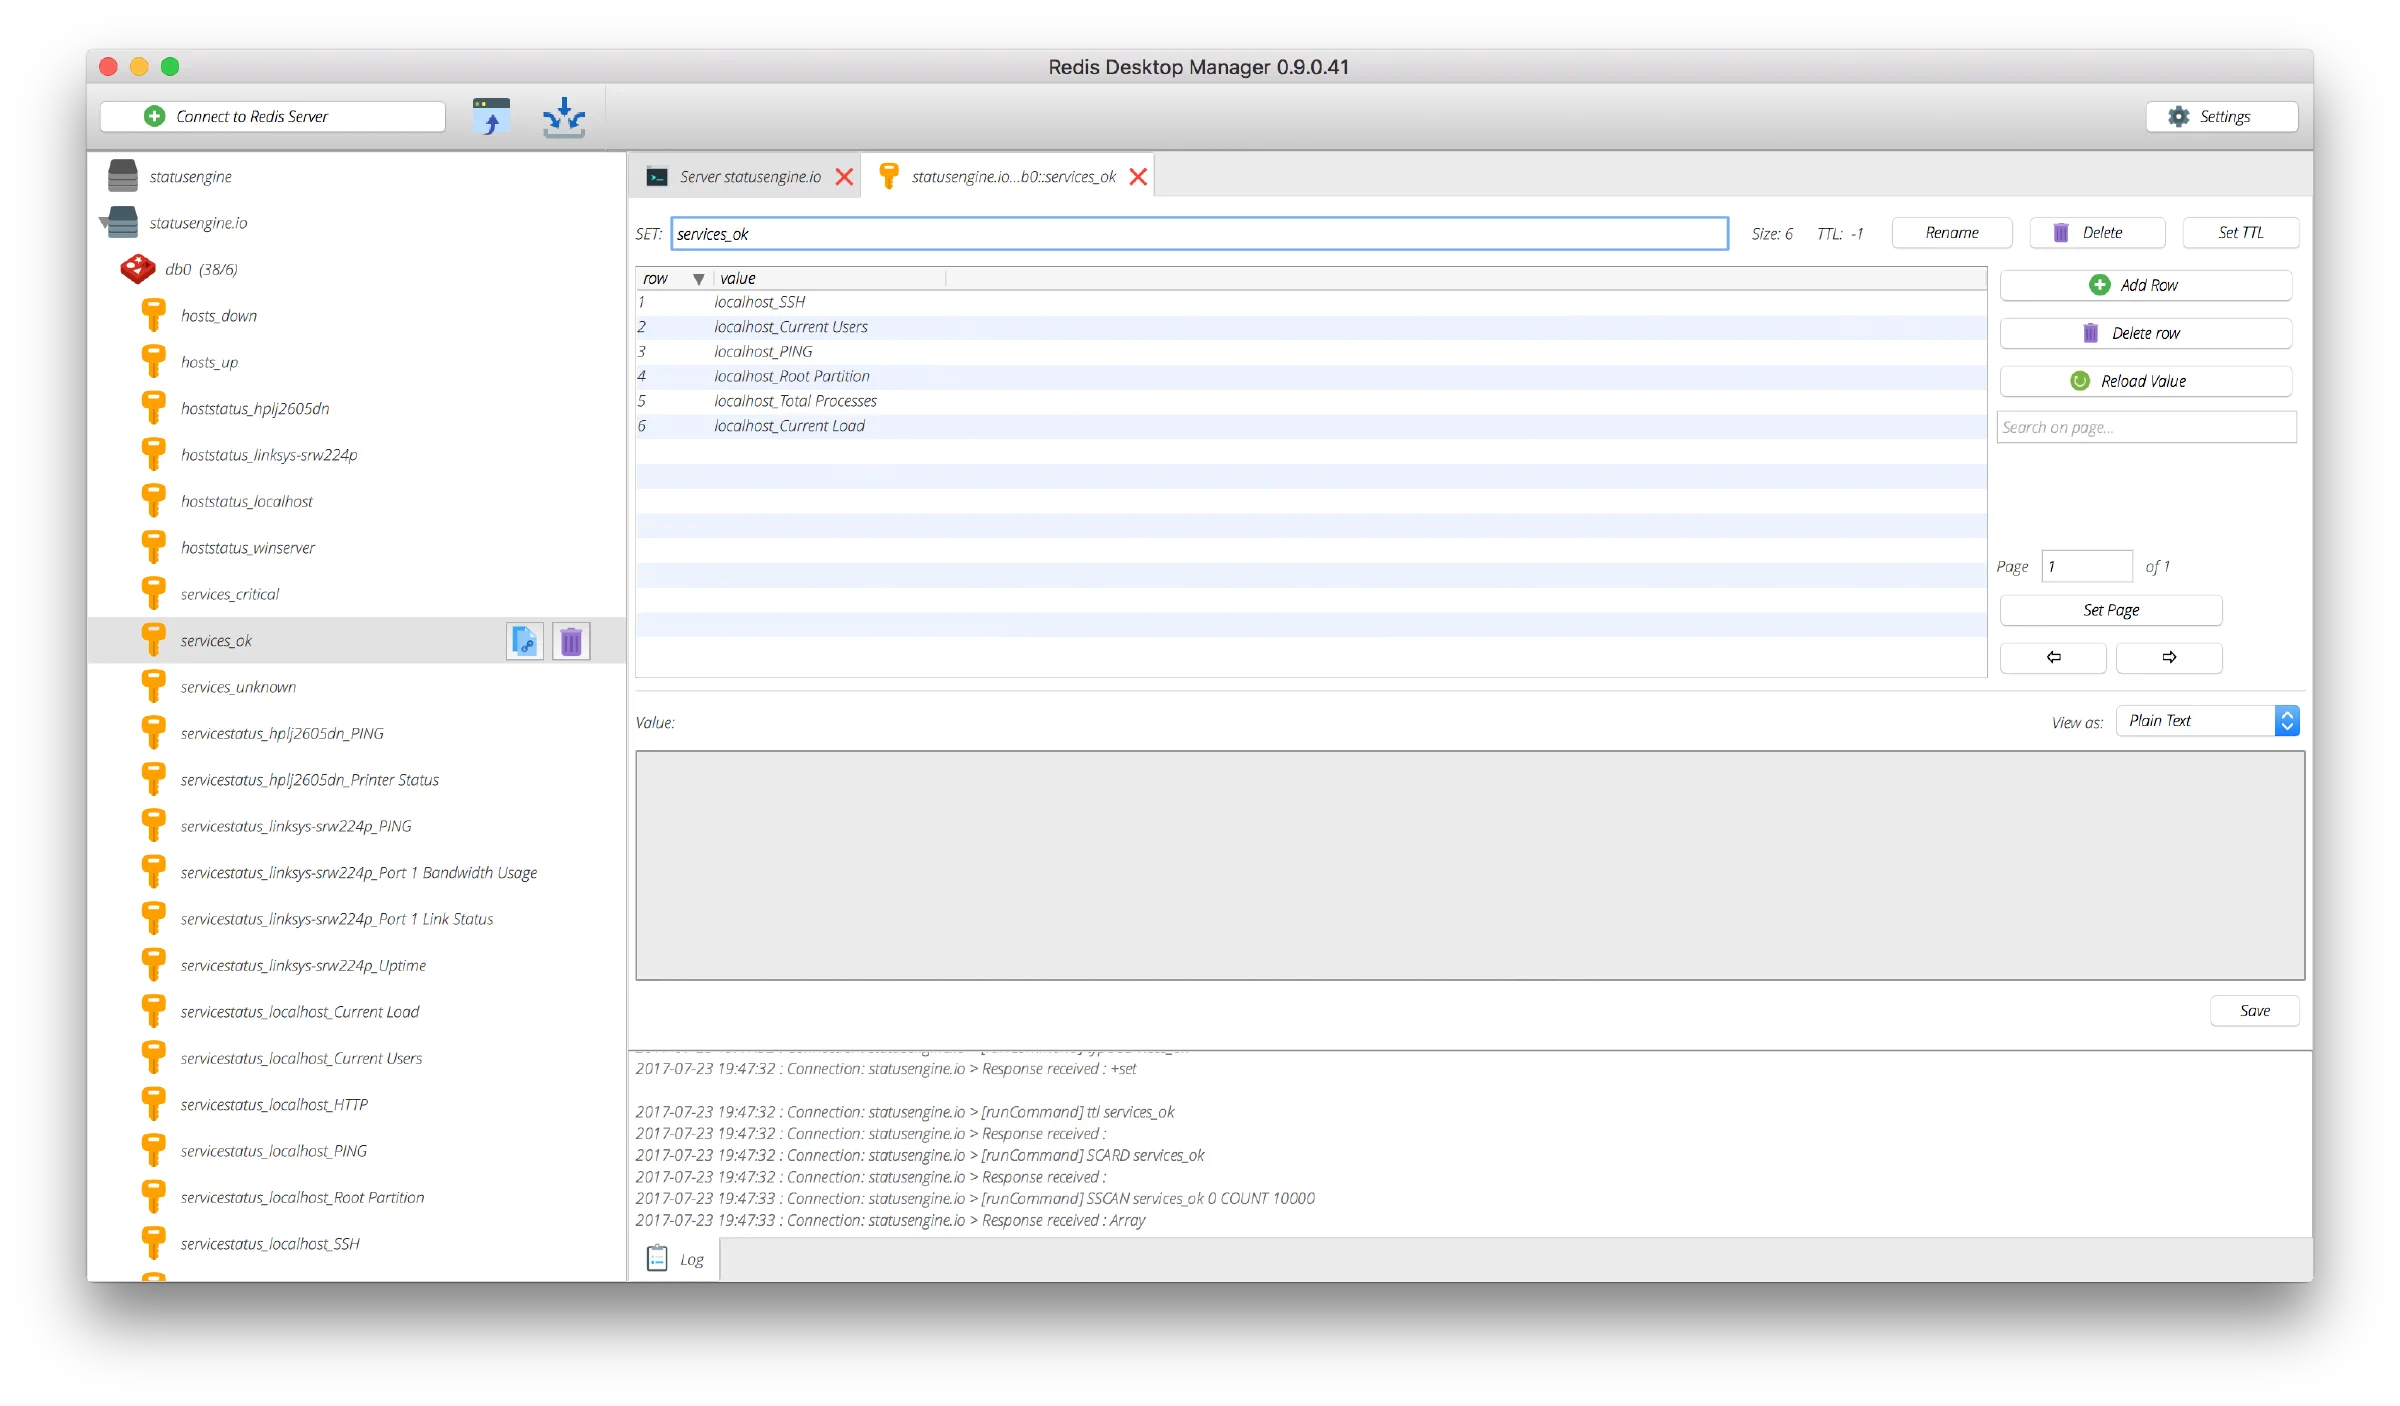
services_ok,services_warning,services_critical,services_unknown) - The host status object of every host (
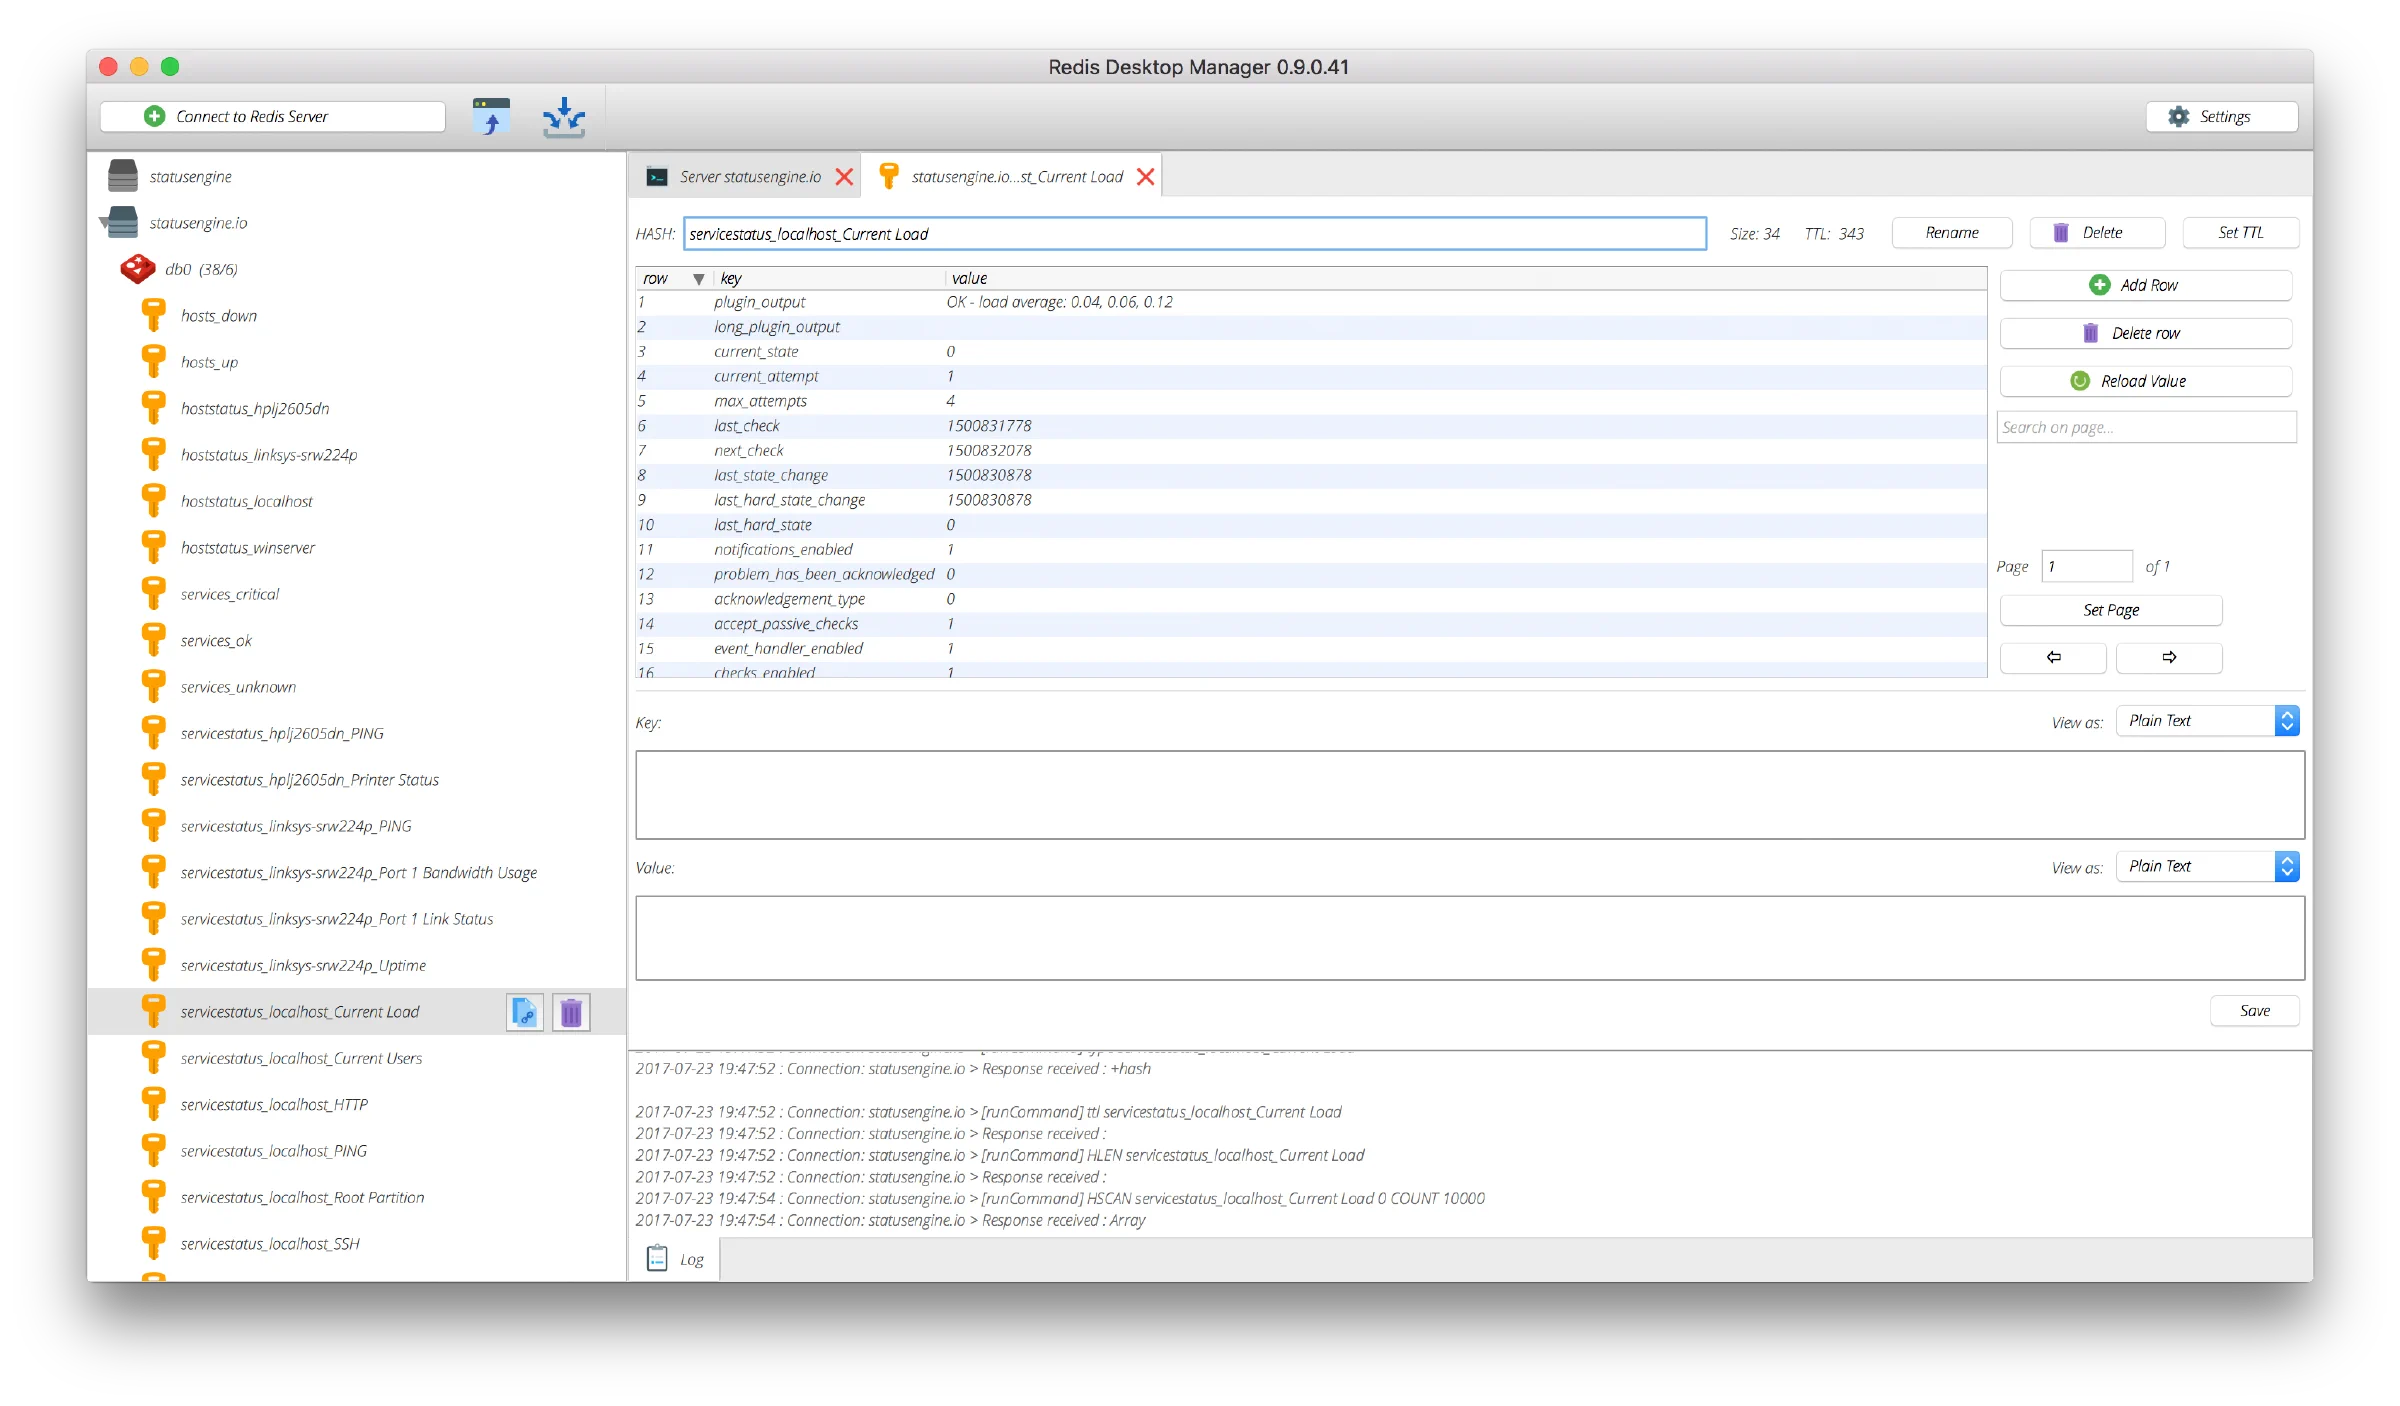
hoststatus_<hostname>) - The service status object of every service (
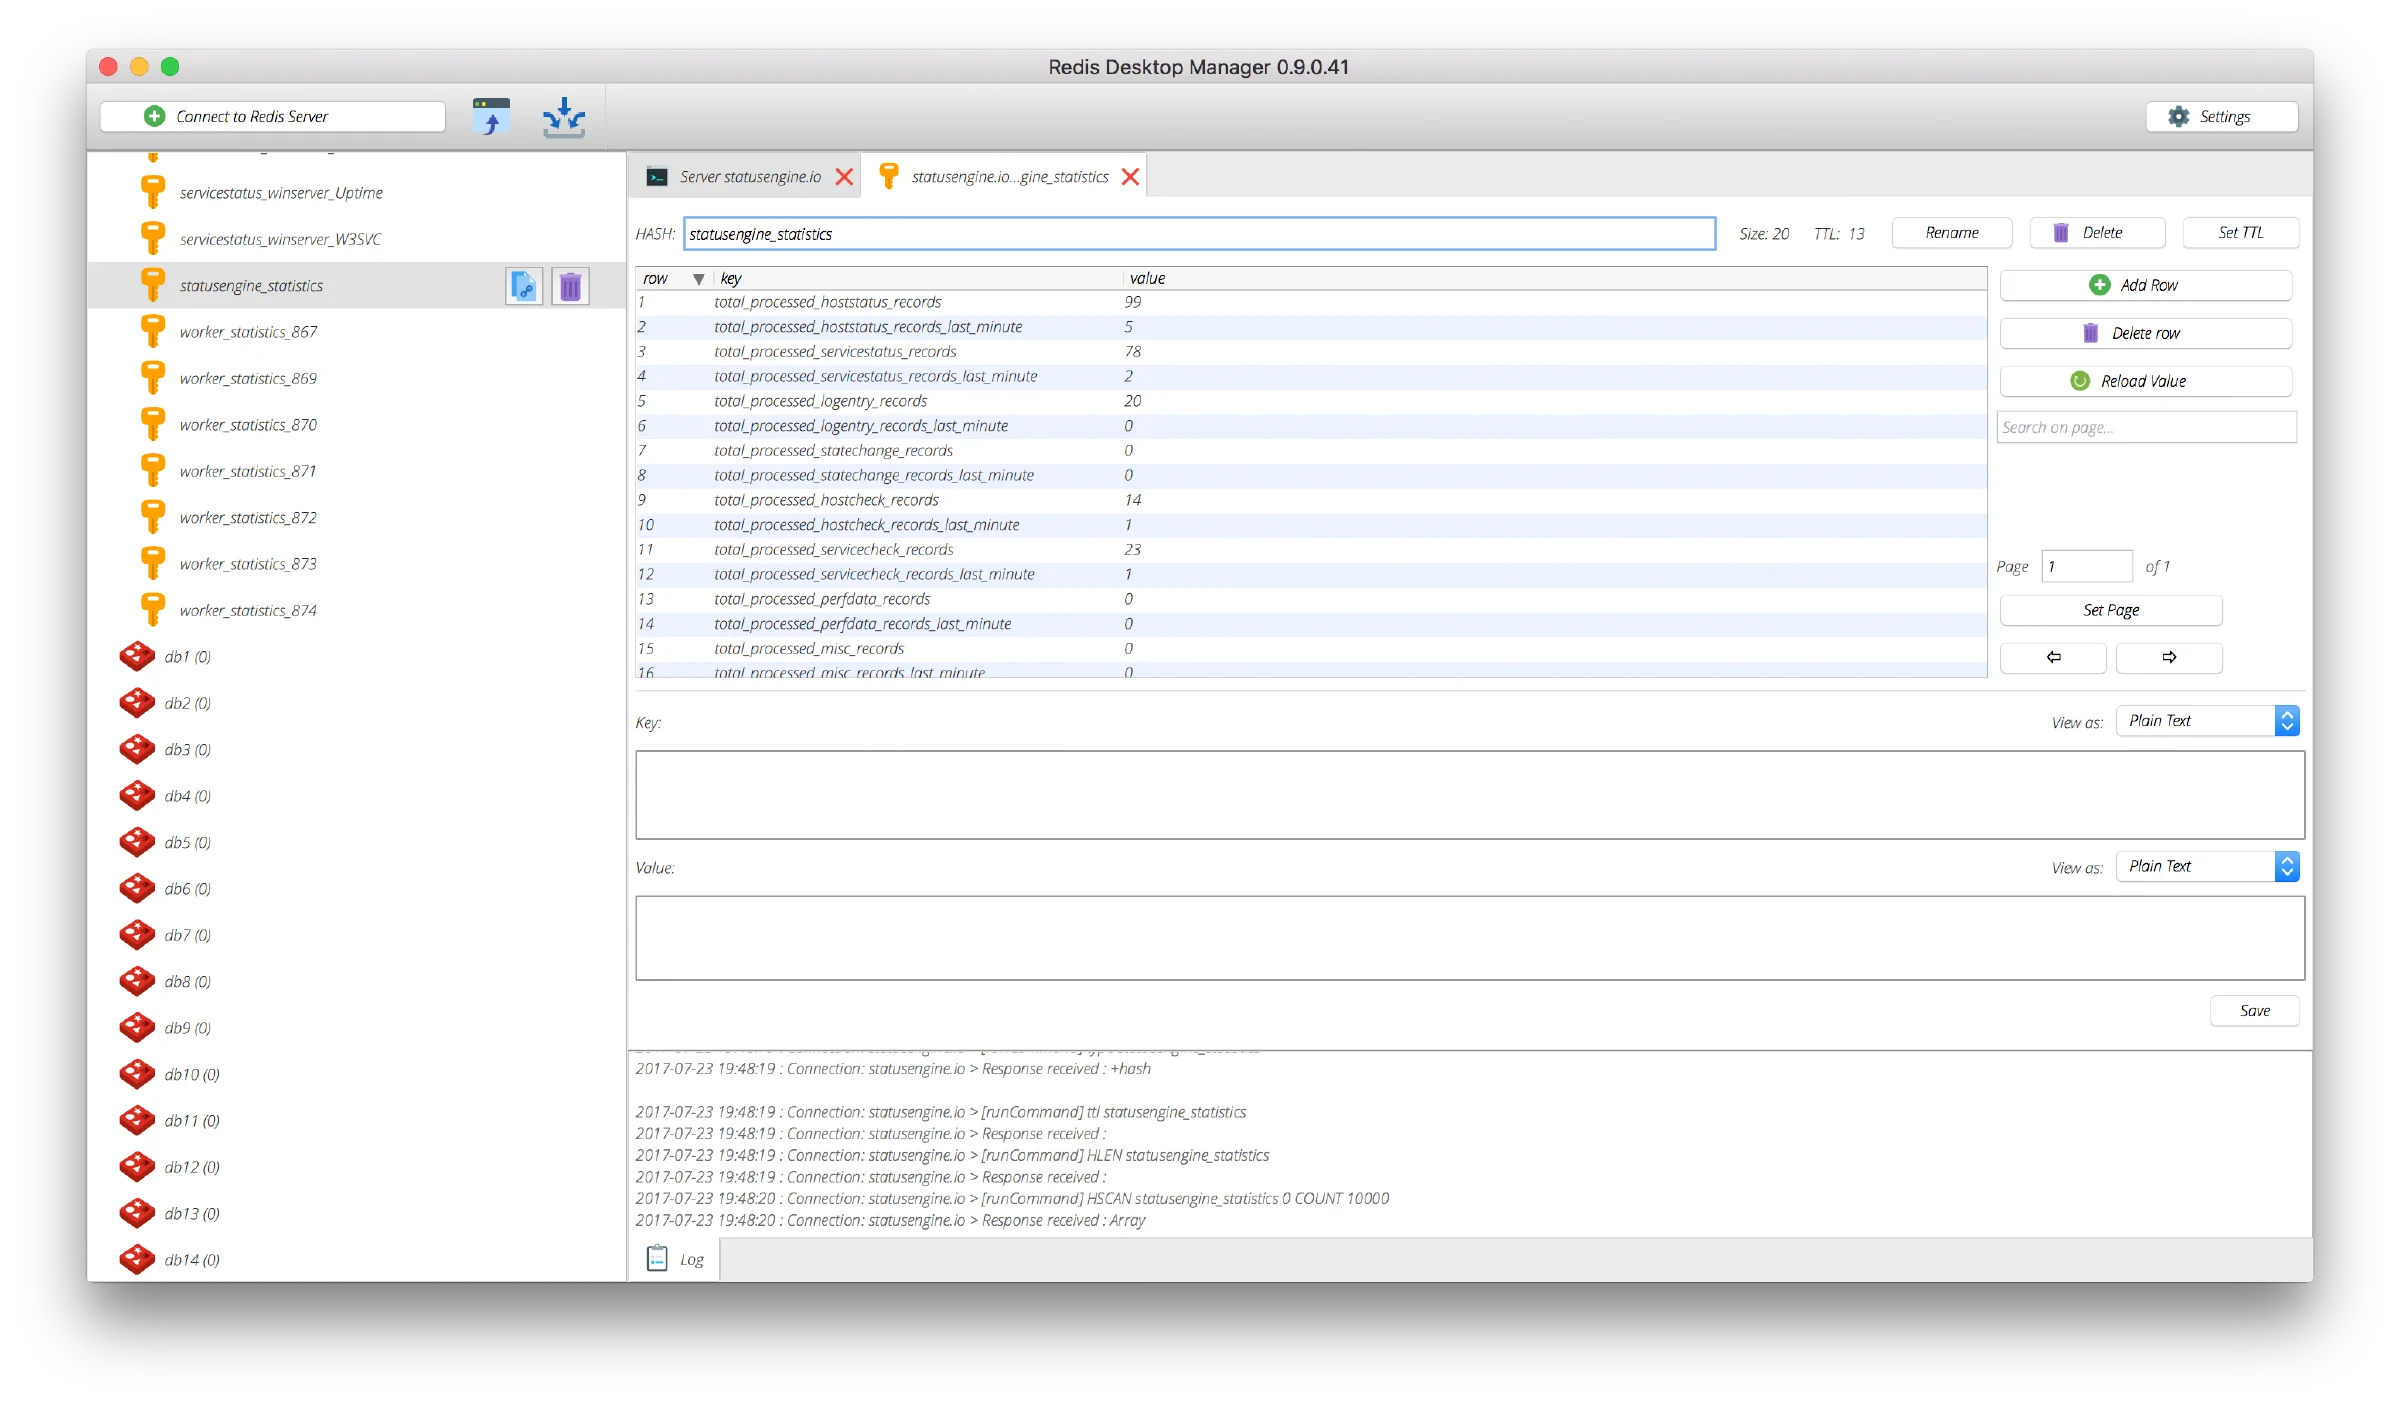
servicestatus_<hostname>_<service_description>) - Internal Statusengine statistics (
statusengine_statistics,worker_statistics_<pid>)
Statusengine always requires a storage backend in addition to Redis — MySQL or
CrateDB — for the cluster status and the external command router. To enable the
Redis backend, set use_redis=1 in the worker’s config.yml.
A list of all services in state “Ok”:
Service status data of a particular service:
Internal Statusengine statistics:
How to update
Make sure the PHP extension bcmath is installed. You can check with
php -m | grep bcmath.
If you installed Statusengine through git, the update is done quickly.
Stop Statusengine Worker
systemctl stop statusengine # Ubuntu 14.04: service statusengine stopCreate a backup of your files
cp -r /opt/statusengine/worker /some/backup/pathUpdate your local files
cd /opt/statusengine/worker
git pull origin master
composer update
Update your database (if required)
MySQL users — Statusengine handles schema updates automatically. With
--dry-runthe update statements are only printed, not executed./opt/statusengine/worker/bin/Console.php database --updateCrateDB users — check
/opt/statusengine/worker/libfor database update files. Their names look likecrateDB_3.1.0_TO_3.2.0.sql. Execute every SQL file in the right order. The current schema version is stored in the tablestatusengine_dbversion.Check for configuration changes
Your old configuration is still loaded, and the worker defines a default for every configuration variable. Still, compare your configuration with the new example file for interesting new options.
vimdiff /opt/statusengine/worker/etc/config.yml /opt/statusengine/worker/etc/config.yml.exampleStart Statusengine Worker
systemctl start statusengine # Ubuntu 14.04: service statusengine start
Update to 3.7
These instructions only affect MySQL users. If you use CrateDB as a storage backend, continue with the How to update guide.
Statusengine 3.7 added new primary keys to the MySQL schema, which speeds up select performance considerably. Adding the new columns and primary keys can take a while, depending on the size of the database.
Stop Statusengine Worker
systemctl stop statusengineCreate a backup of your files
cp -r /opt/statusengine/worker /some/backup/pathCreate a backup of your database — make sure you have enough disk space
mysqldump -u statusengine -p --databases statusengine --flush-privileges --single-transaction --triggers --routines --no-tablespaces --events --hex-blob --ignore-table=statusengine.statusengine_perfdata > /opt/statusengine/statusengine_dump.sqlUpdate your local files
cd /opt/statusengine/worker
git pull origin master
composer update
Check for configuration changes
vimdiff /opt/statusengine/worker/etc/config.yml /opt/statusengine/worker/etc/config.yml.exampleAdd new primary keys to the database — this takes a while, running it inside tmux or screen is recommended
mysql -u statusengine -p statusengine < /opt/statusengine/worker/lib/mysql_update.sqlUpdate the database schema — this also takes a while
/opt/statusengine/worker/bin/Console.php database --updateStart Statusengine Worker
systemctl start statusengine
Debugging
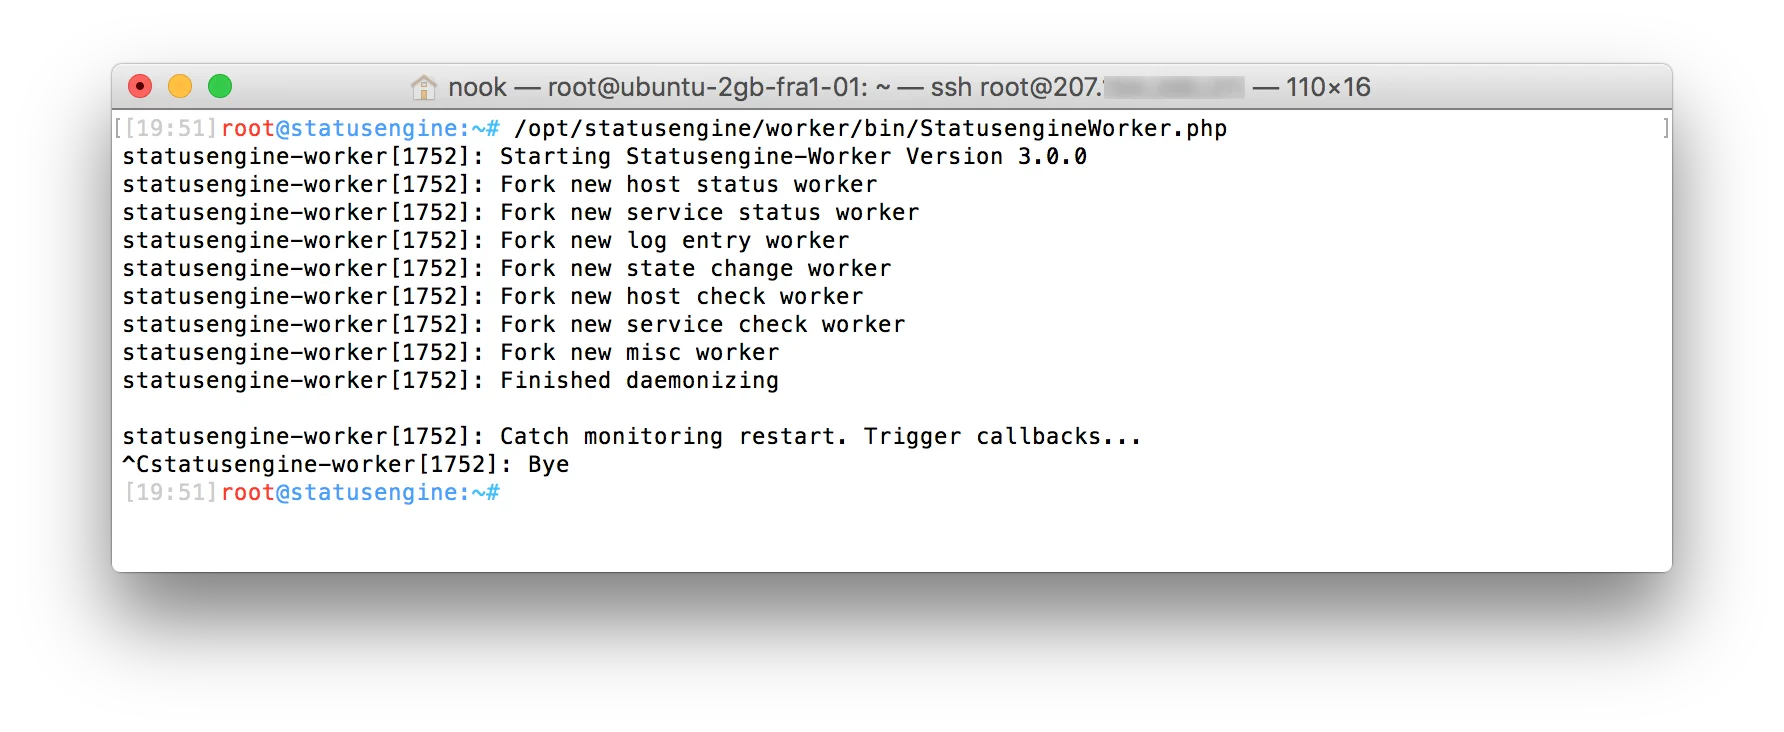
For better debugging you can run Statusengine in the foreground. Exit with Ctrl+C.